Discord
The Discord plug-in gives Jancy the ability to “talk” to one or more Discord servers.
Quick Setup
You need from Discord:
- a discord bot token
- a client/application ID
- a server ID
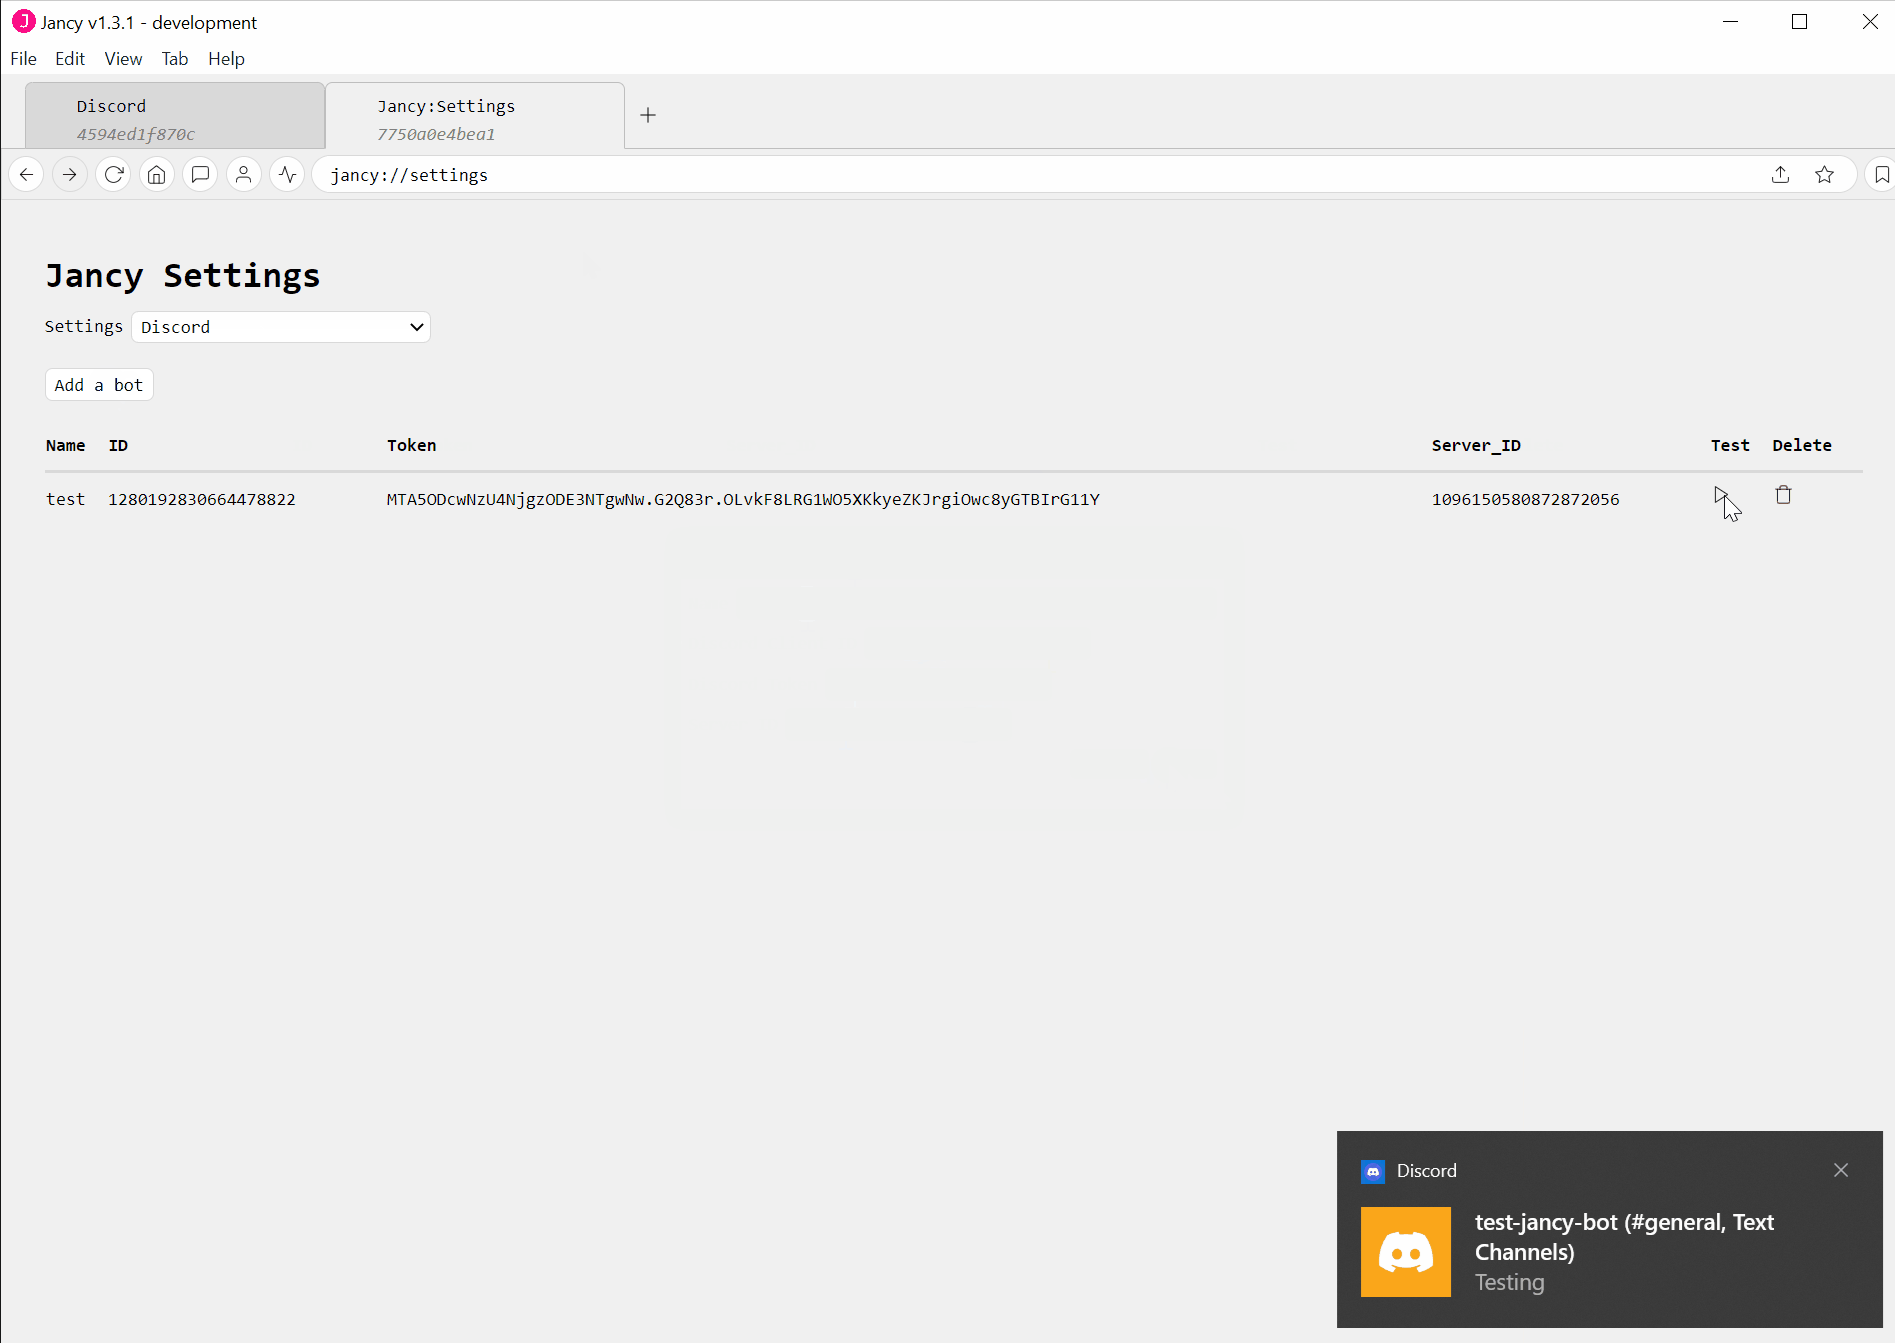
On the Jancy settings page you can choose Discord from the different sections and input these IDs and the token there.
Detailed Setup
Create an application and bot
New Application
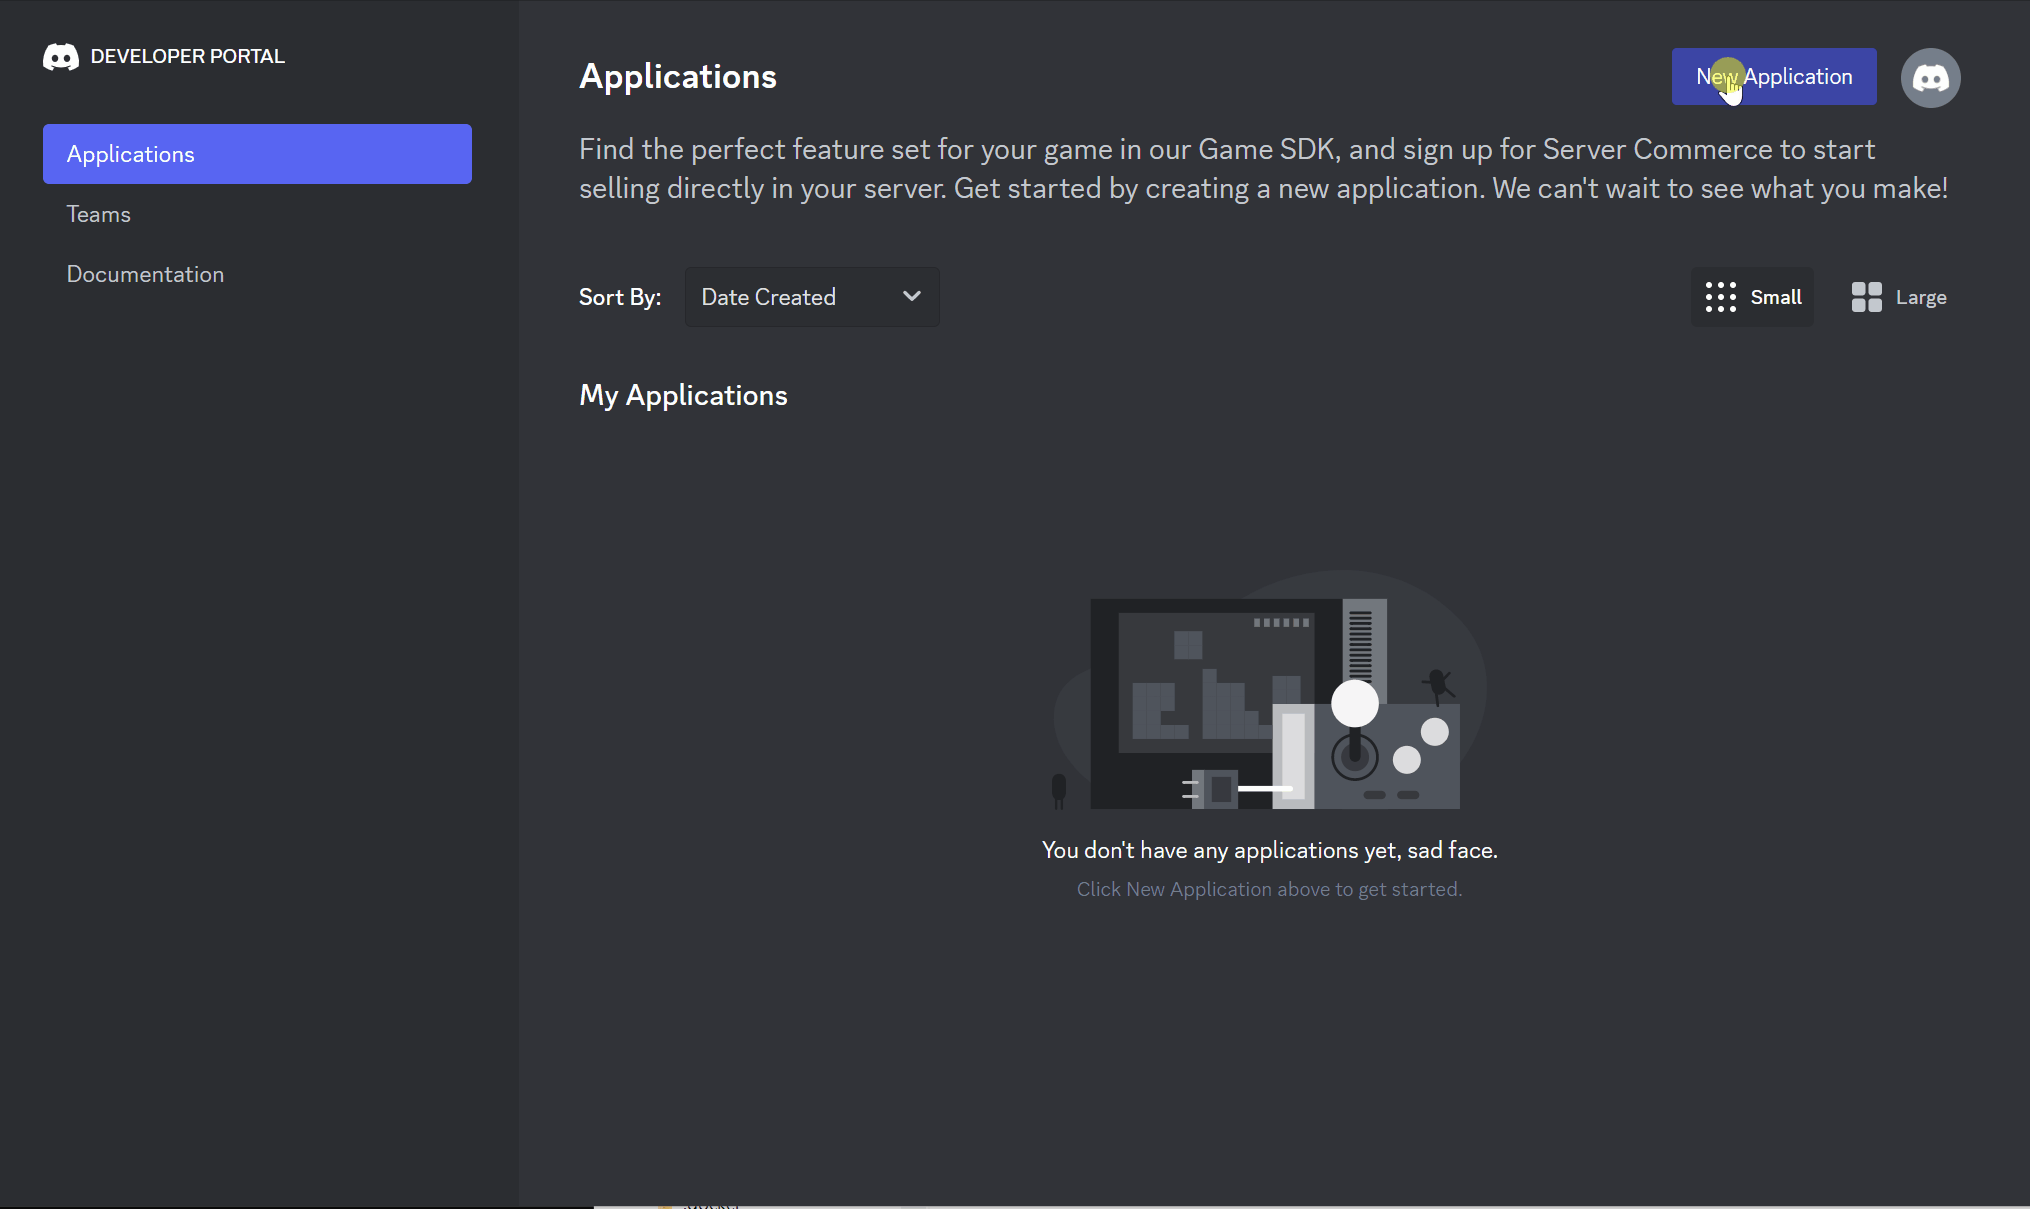
First setup an application here Discord Application Page
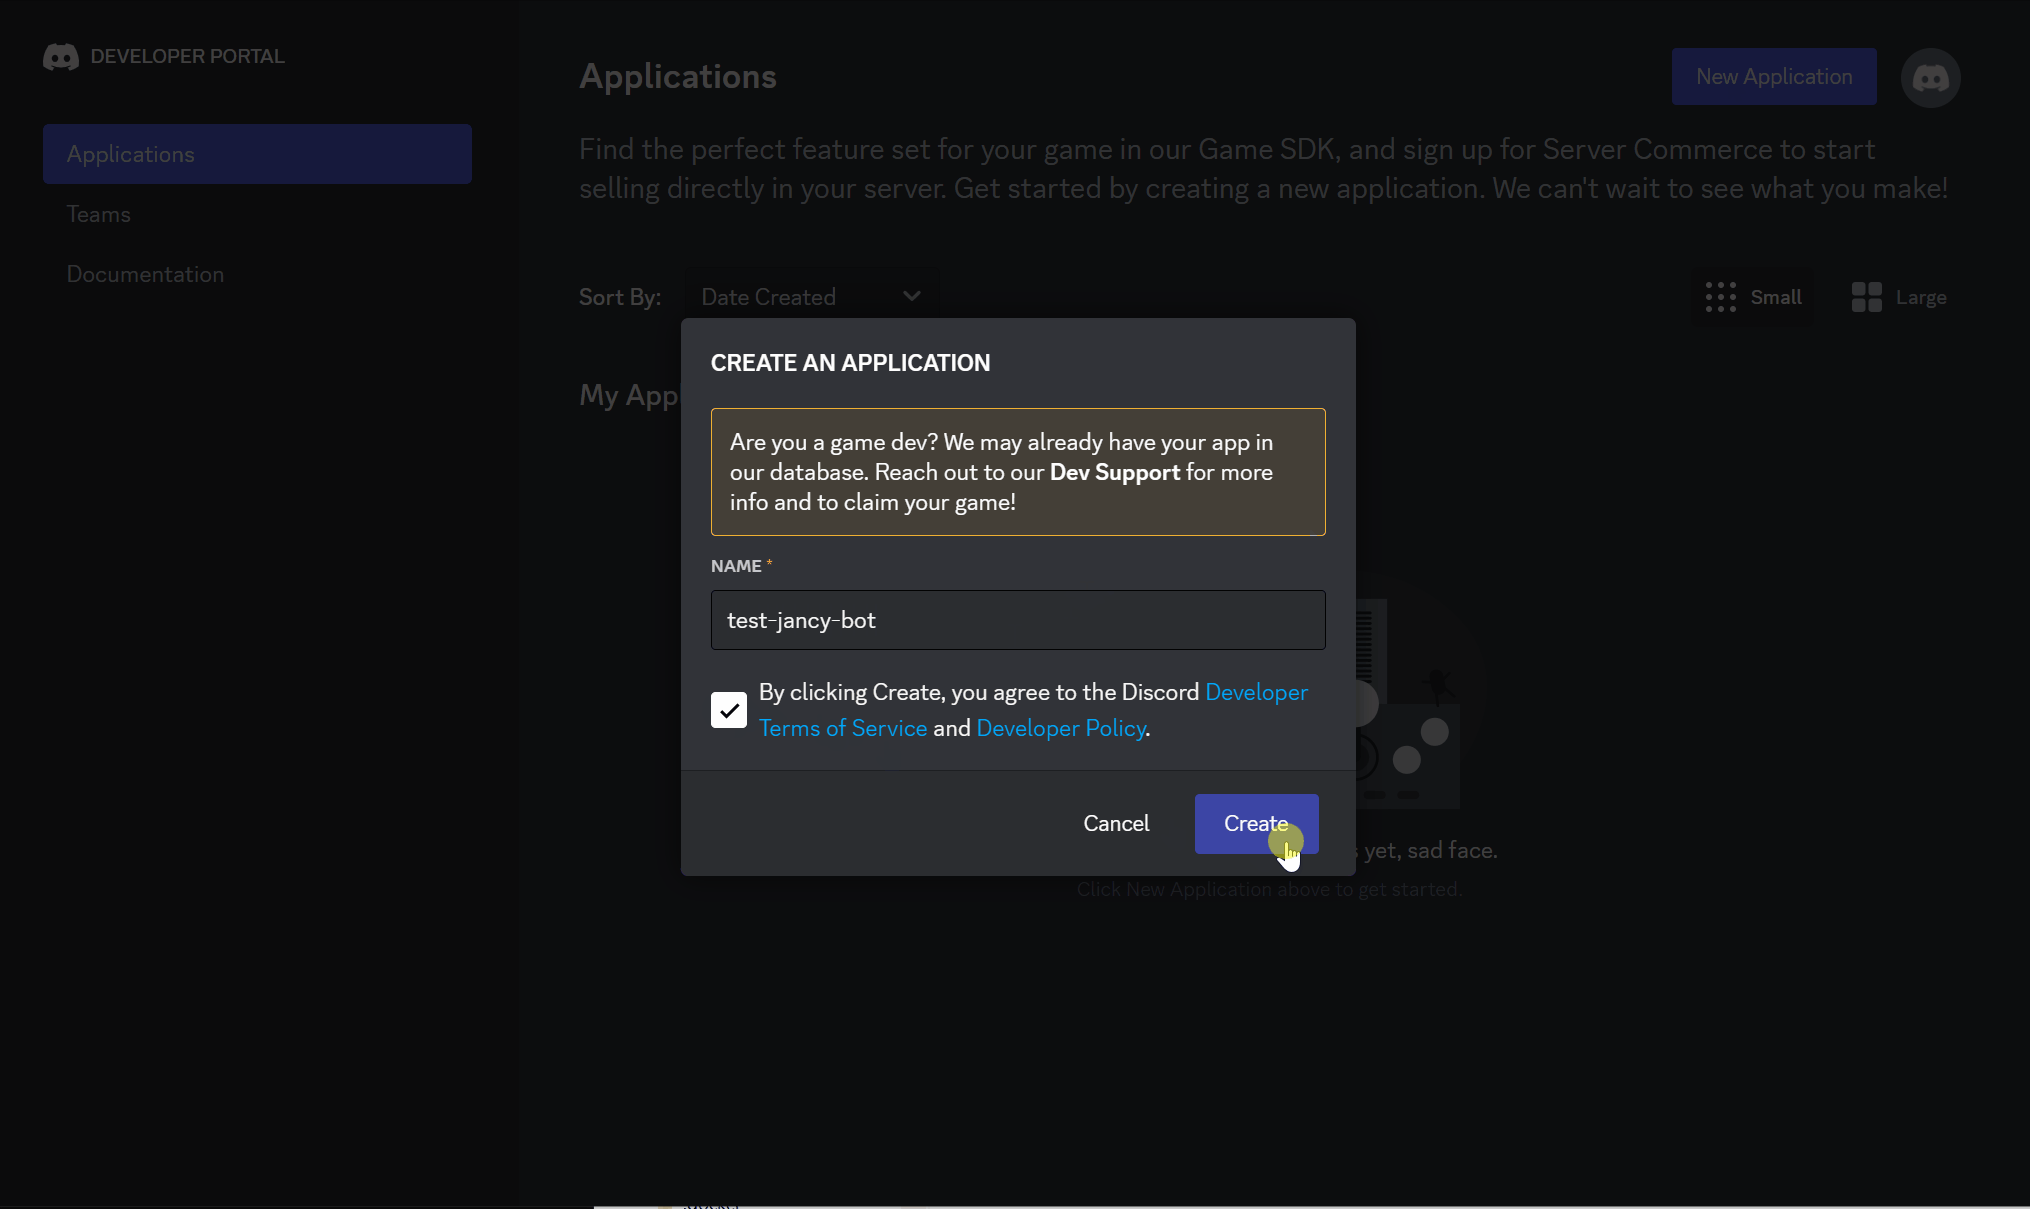
Click the New Application button, fill out a name for the application, and accept the terms
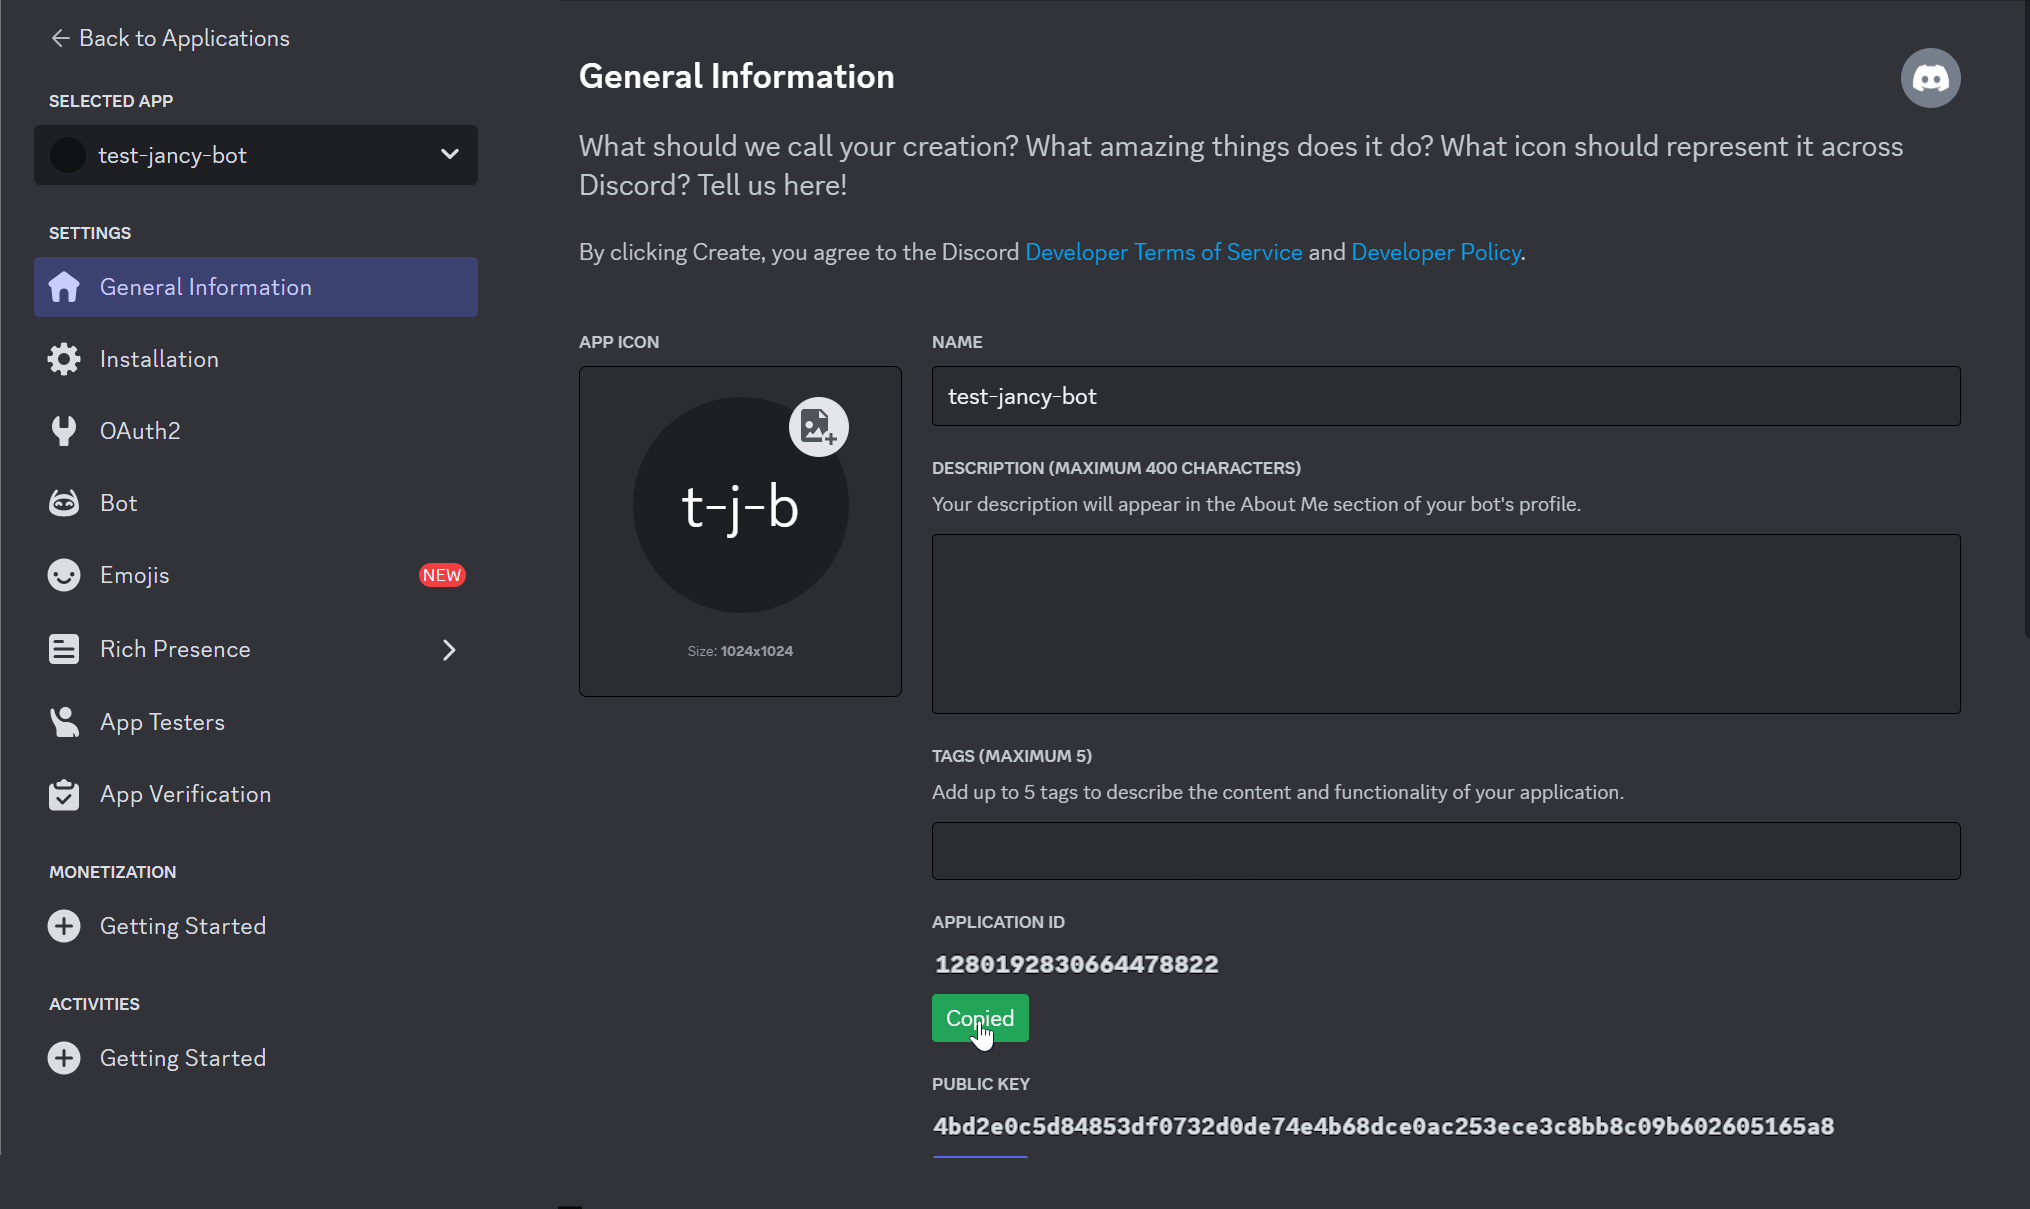
Application ID
Get the Application ID (also called the Client ID in Discord and Jancy)
Next navigate to the Bot section on the left hand side menu. If you have never made a discord bot before you will see this page:
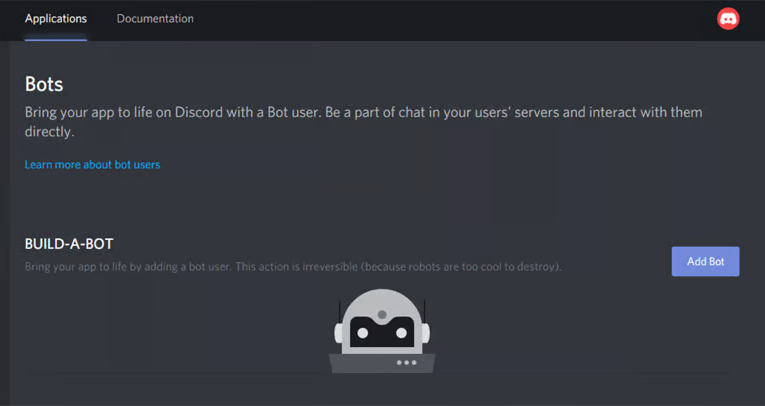
Click Add bot and follow the directions
Get Token
If you have made a bot you will see a page similar to this:
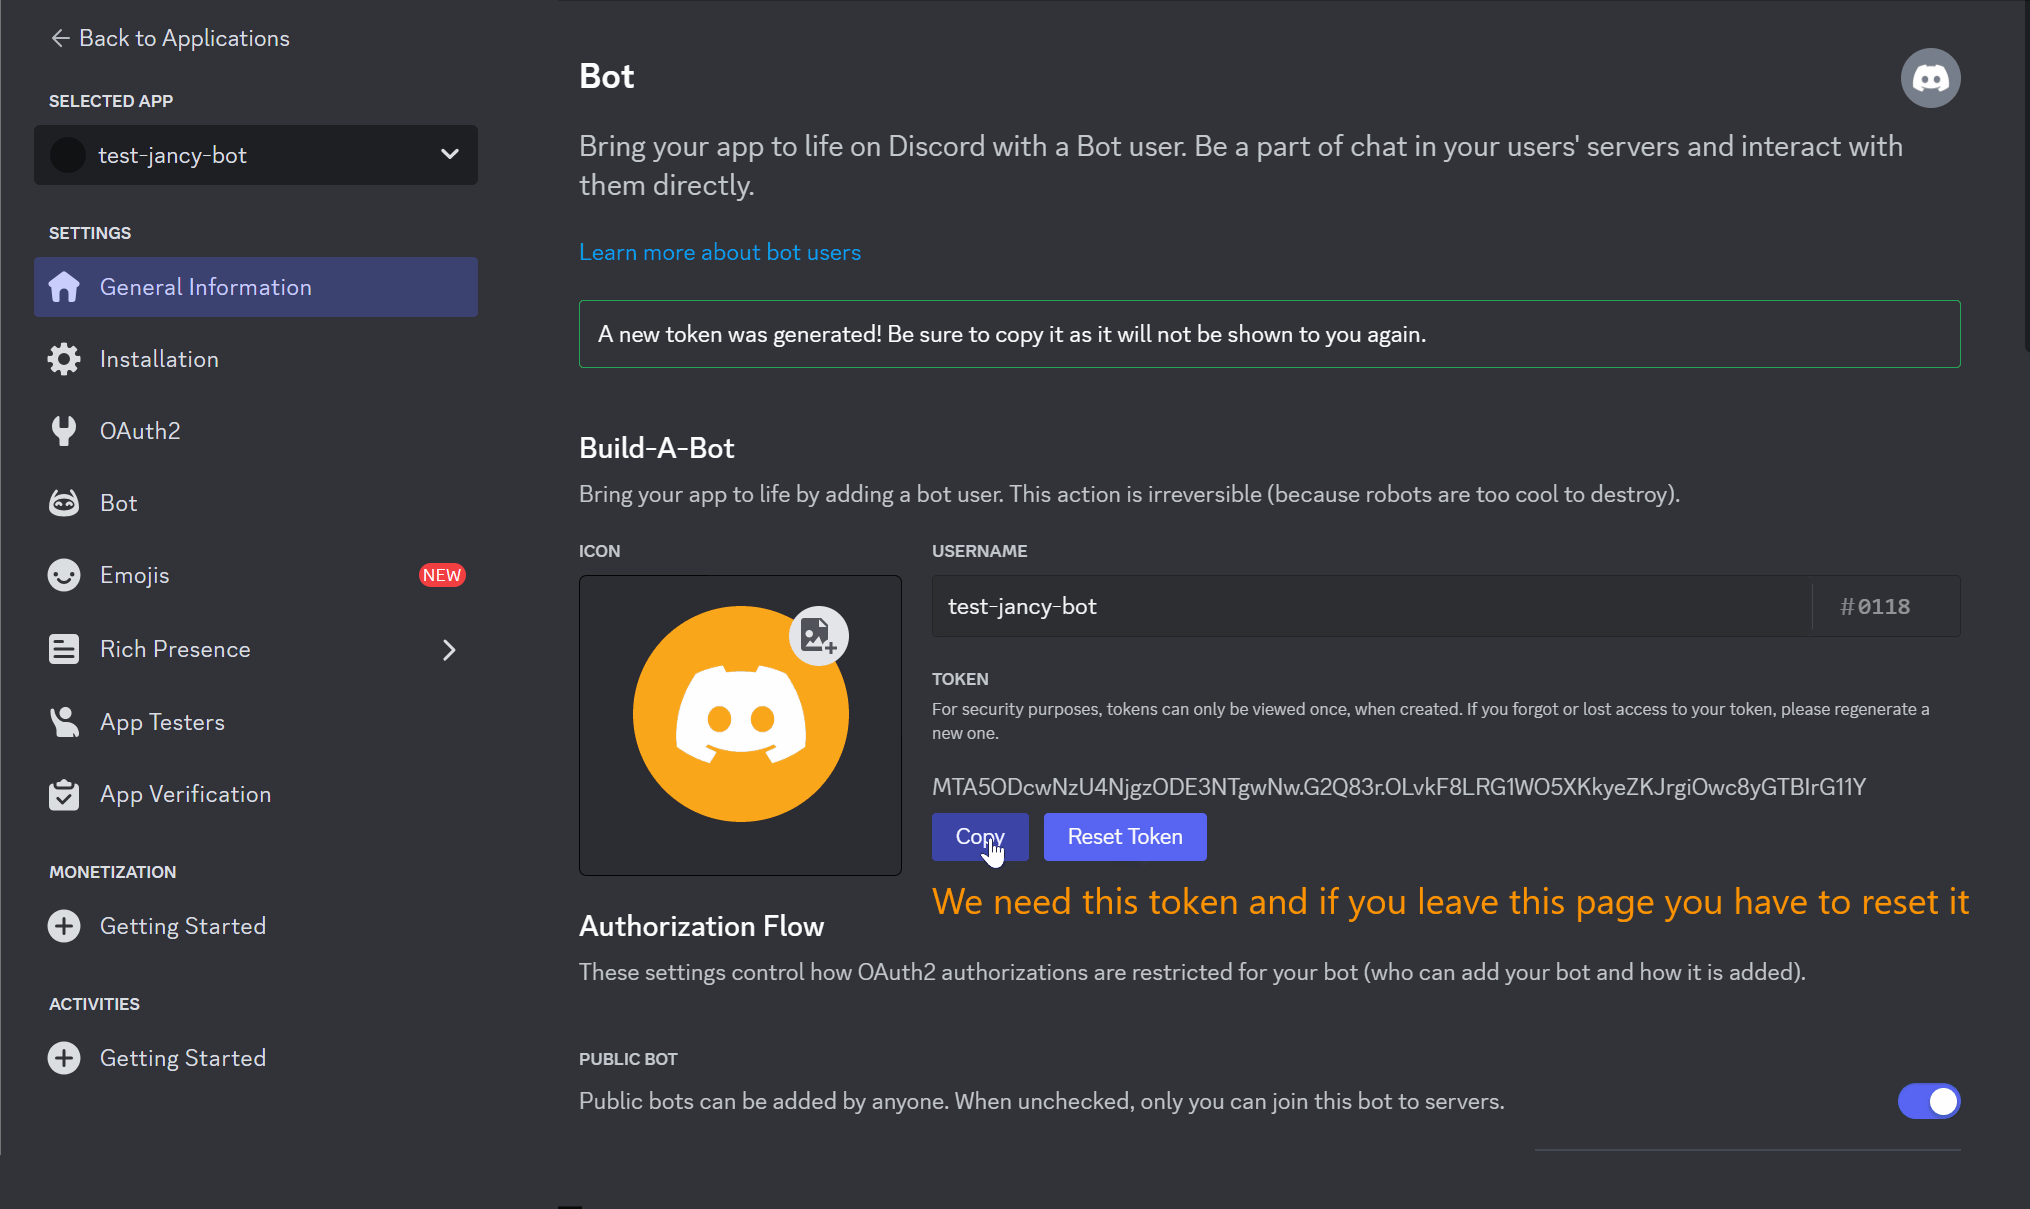
We need this token later. Copy it to a safe spot so you don’t have to reset it.
Configure the bot
Do the following:
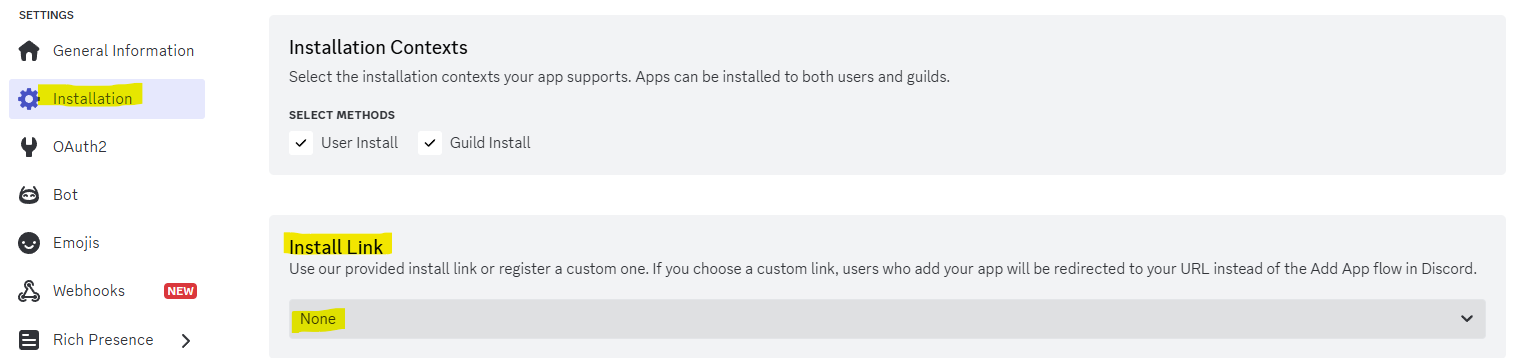
- Navigate to the “Installation” page, and set the install link to “None” if it isn’t already.
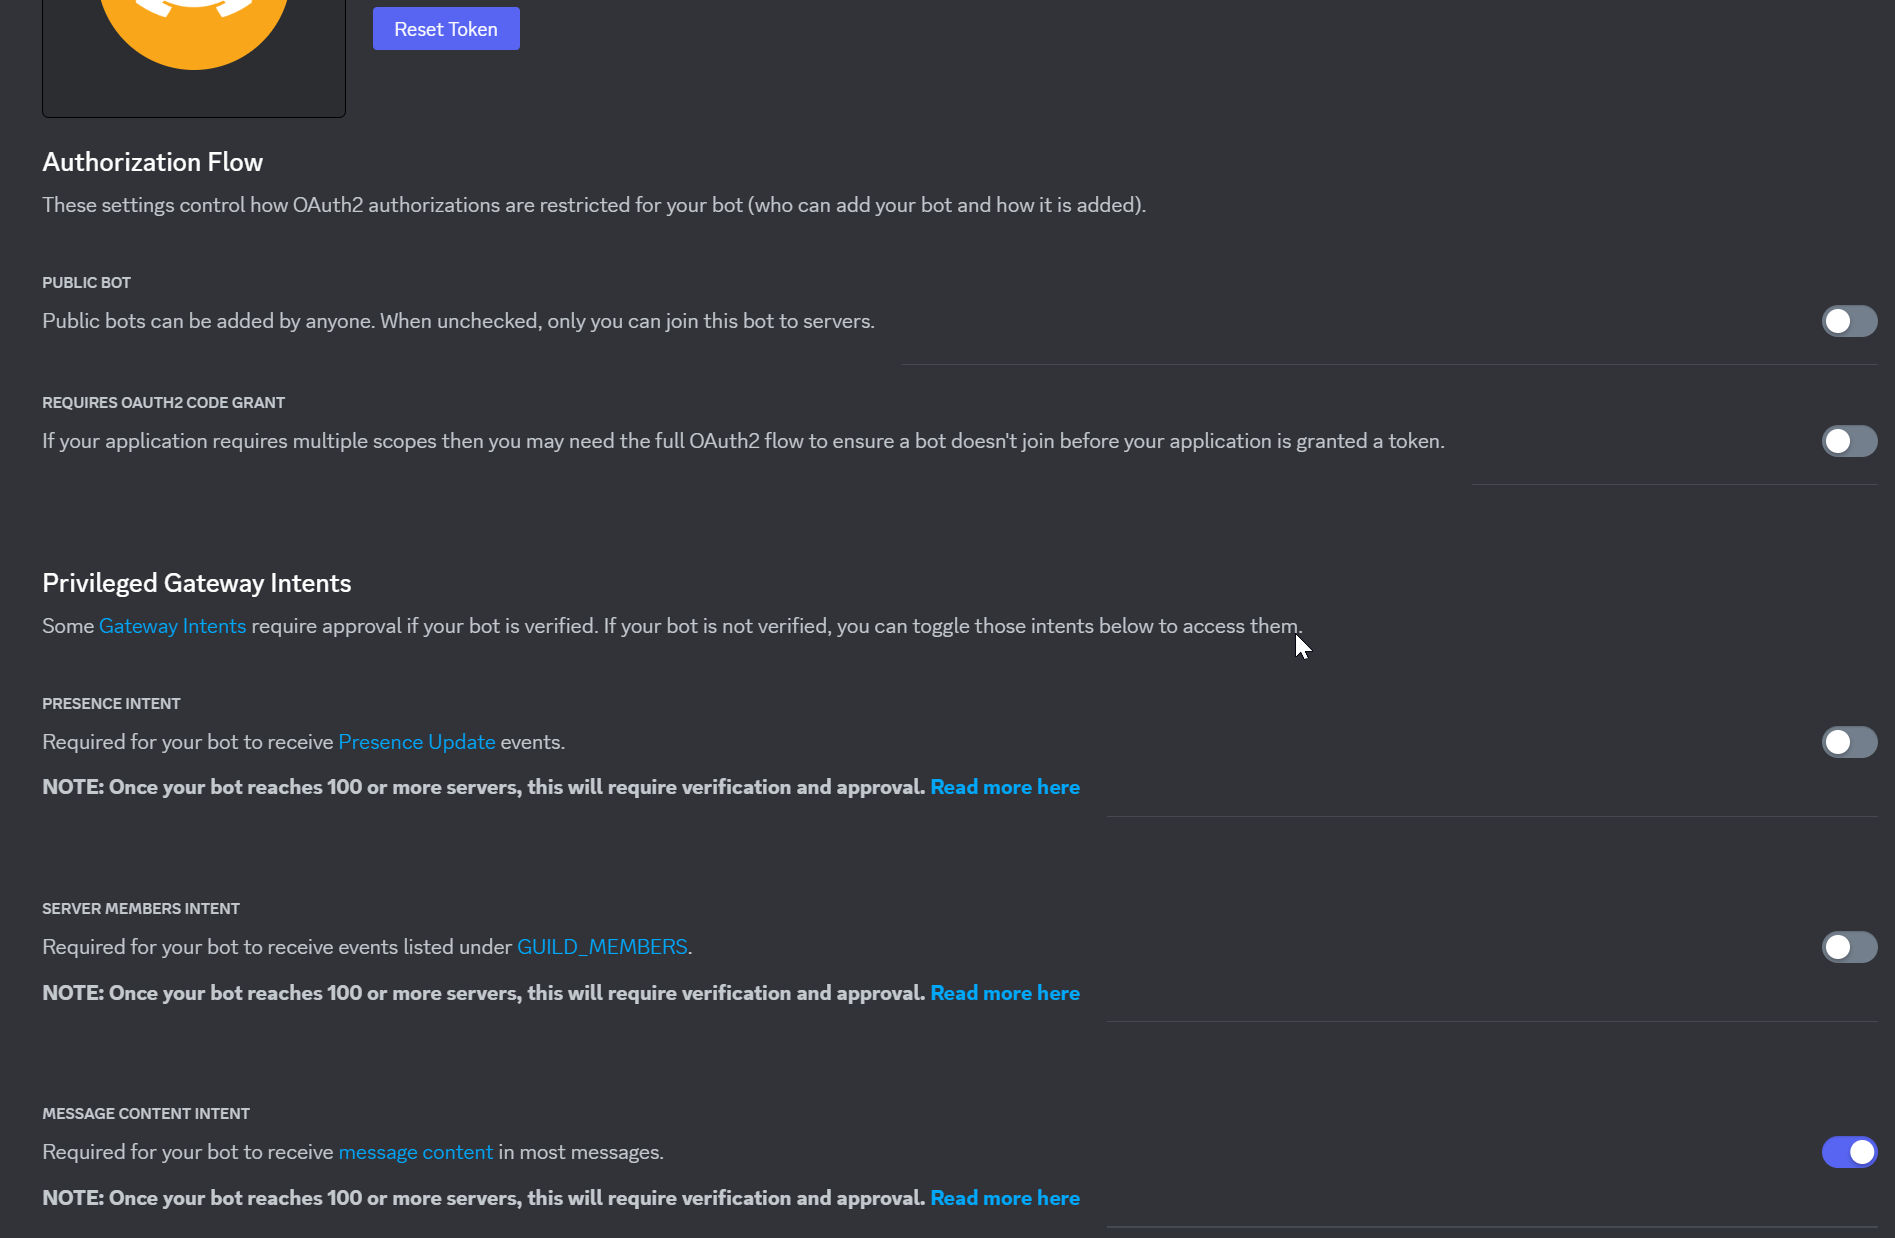
- Make the bot private, if you want to be the only one allowed to connect them to a server
- Turn on the
Message Content Intent- this is so a bot can see message contents so it can respond accordingly if needed
Generate URL
Now we need to go to the OAuth2 menu on the left. To begin press “Add Redirect” button and then in the input box paste this: https://discord.com/api/oauth2/authorize. Then click away from the input and a notification pops up at the bottom of the page and asks to save changes, press “Save Changes”.
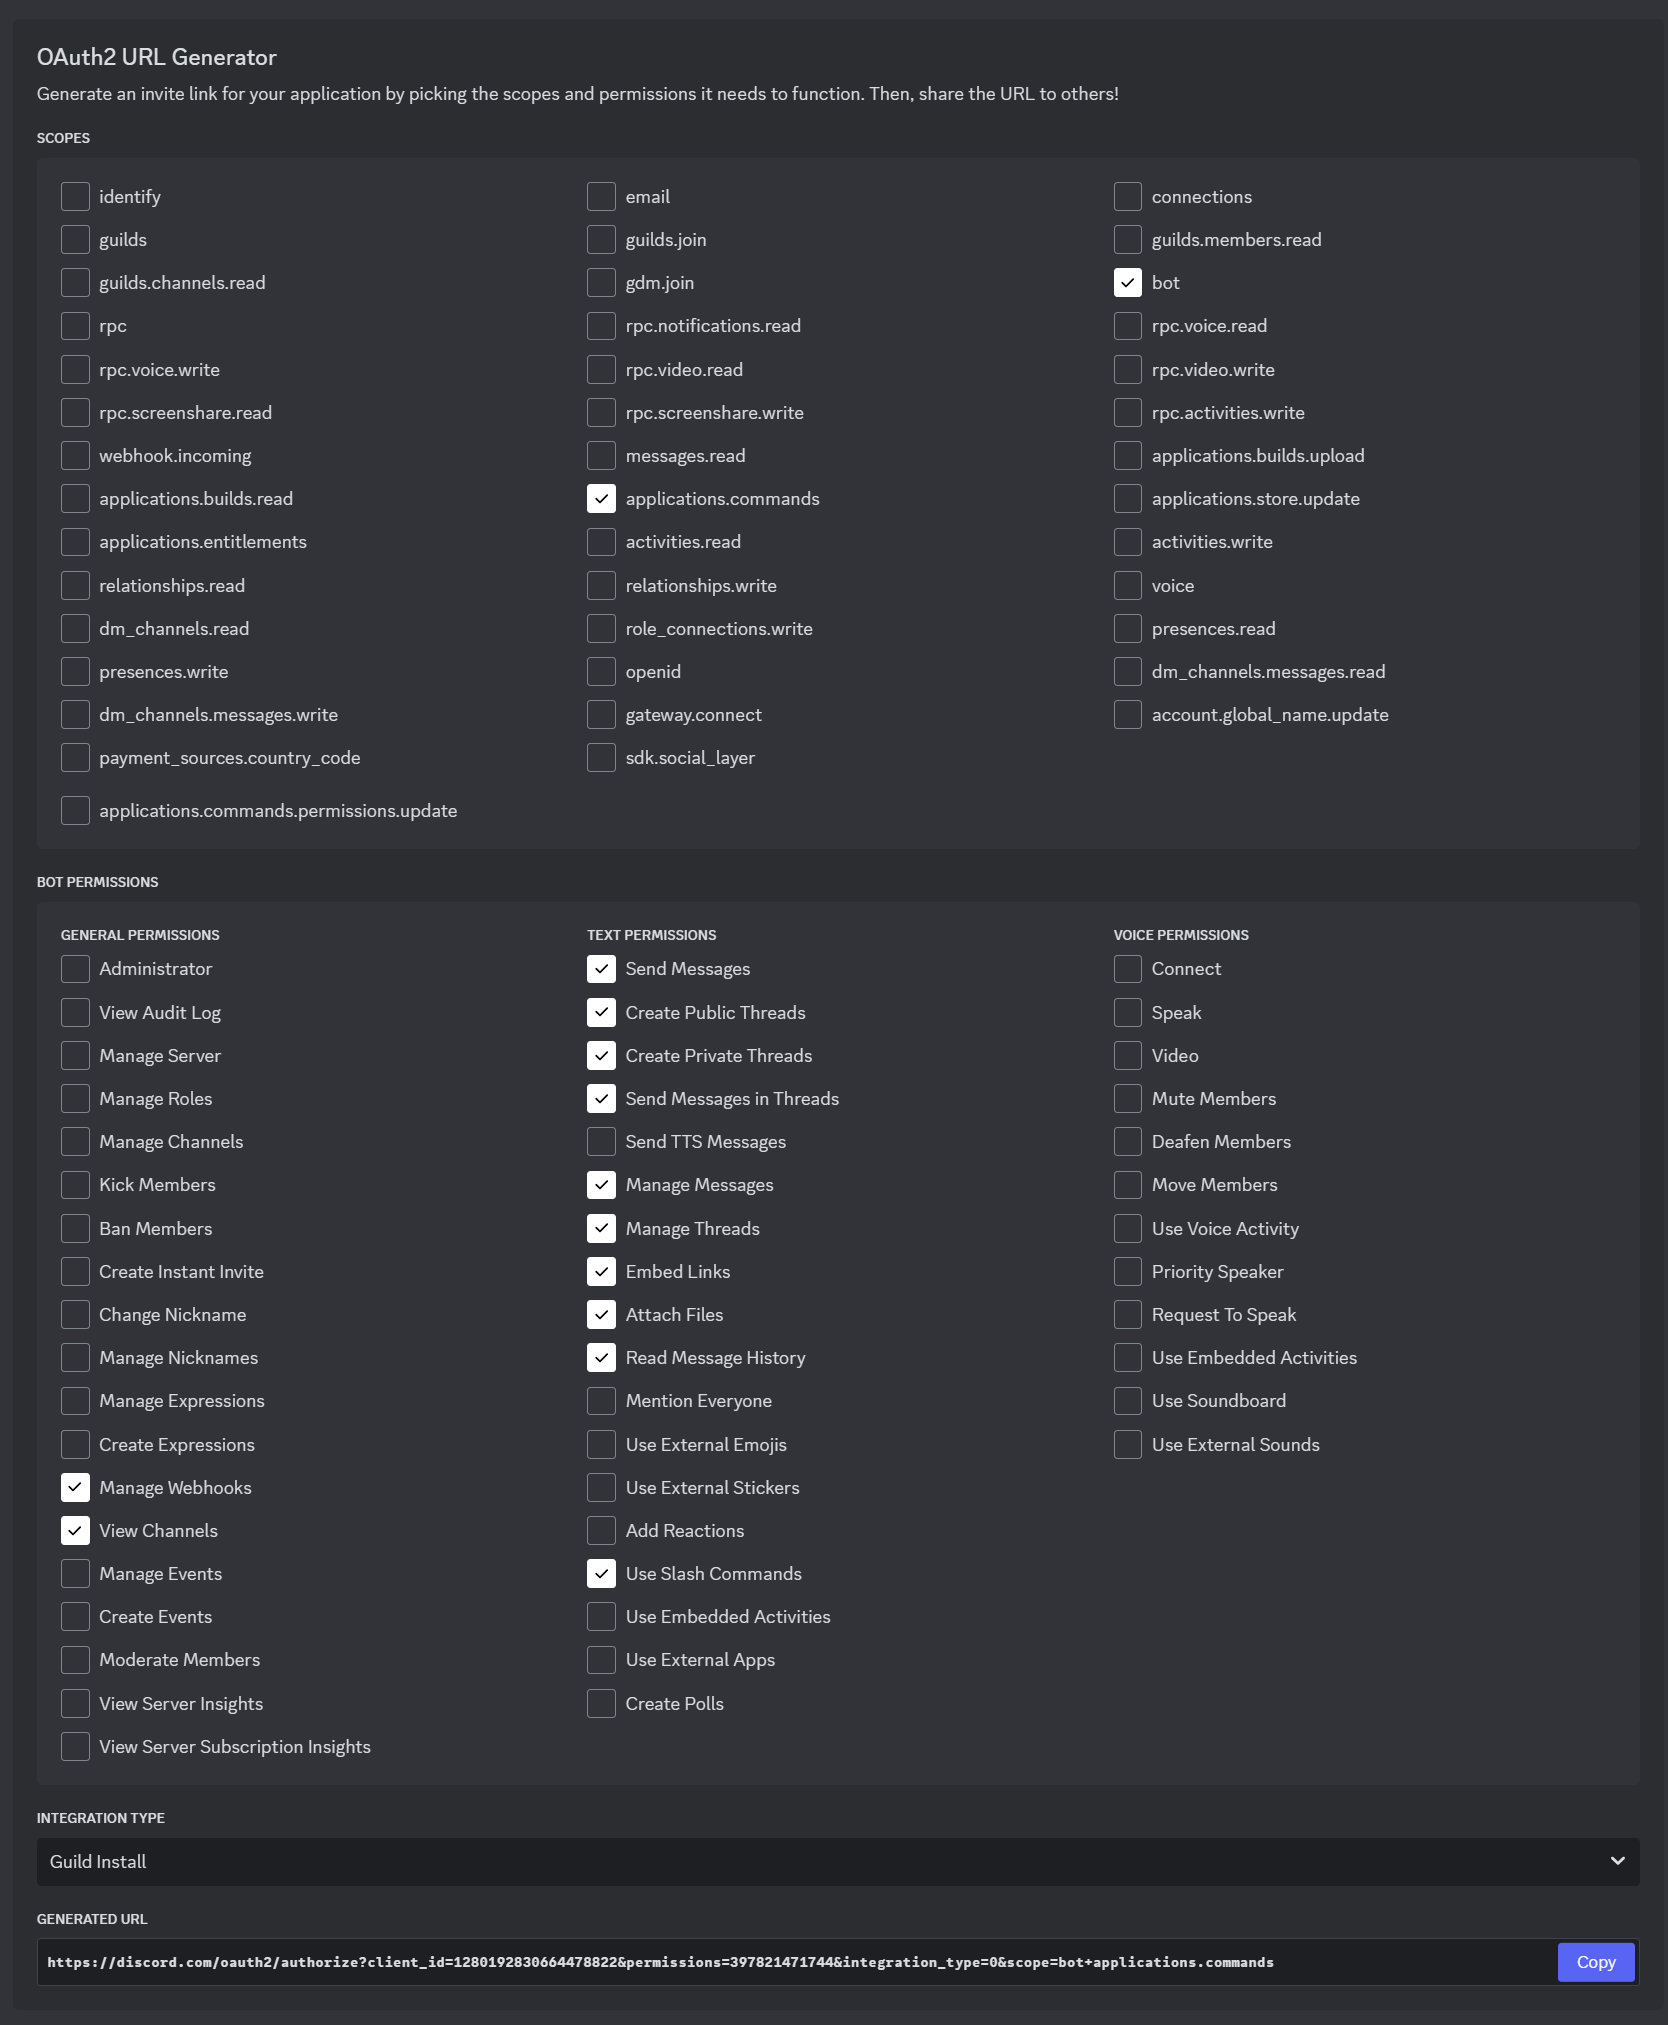
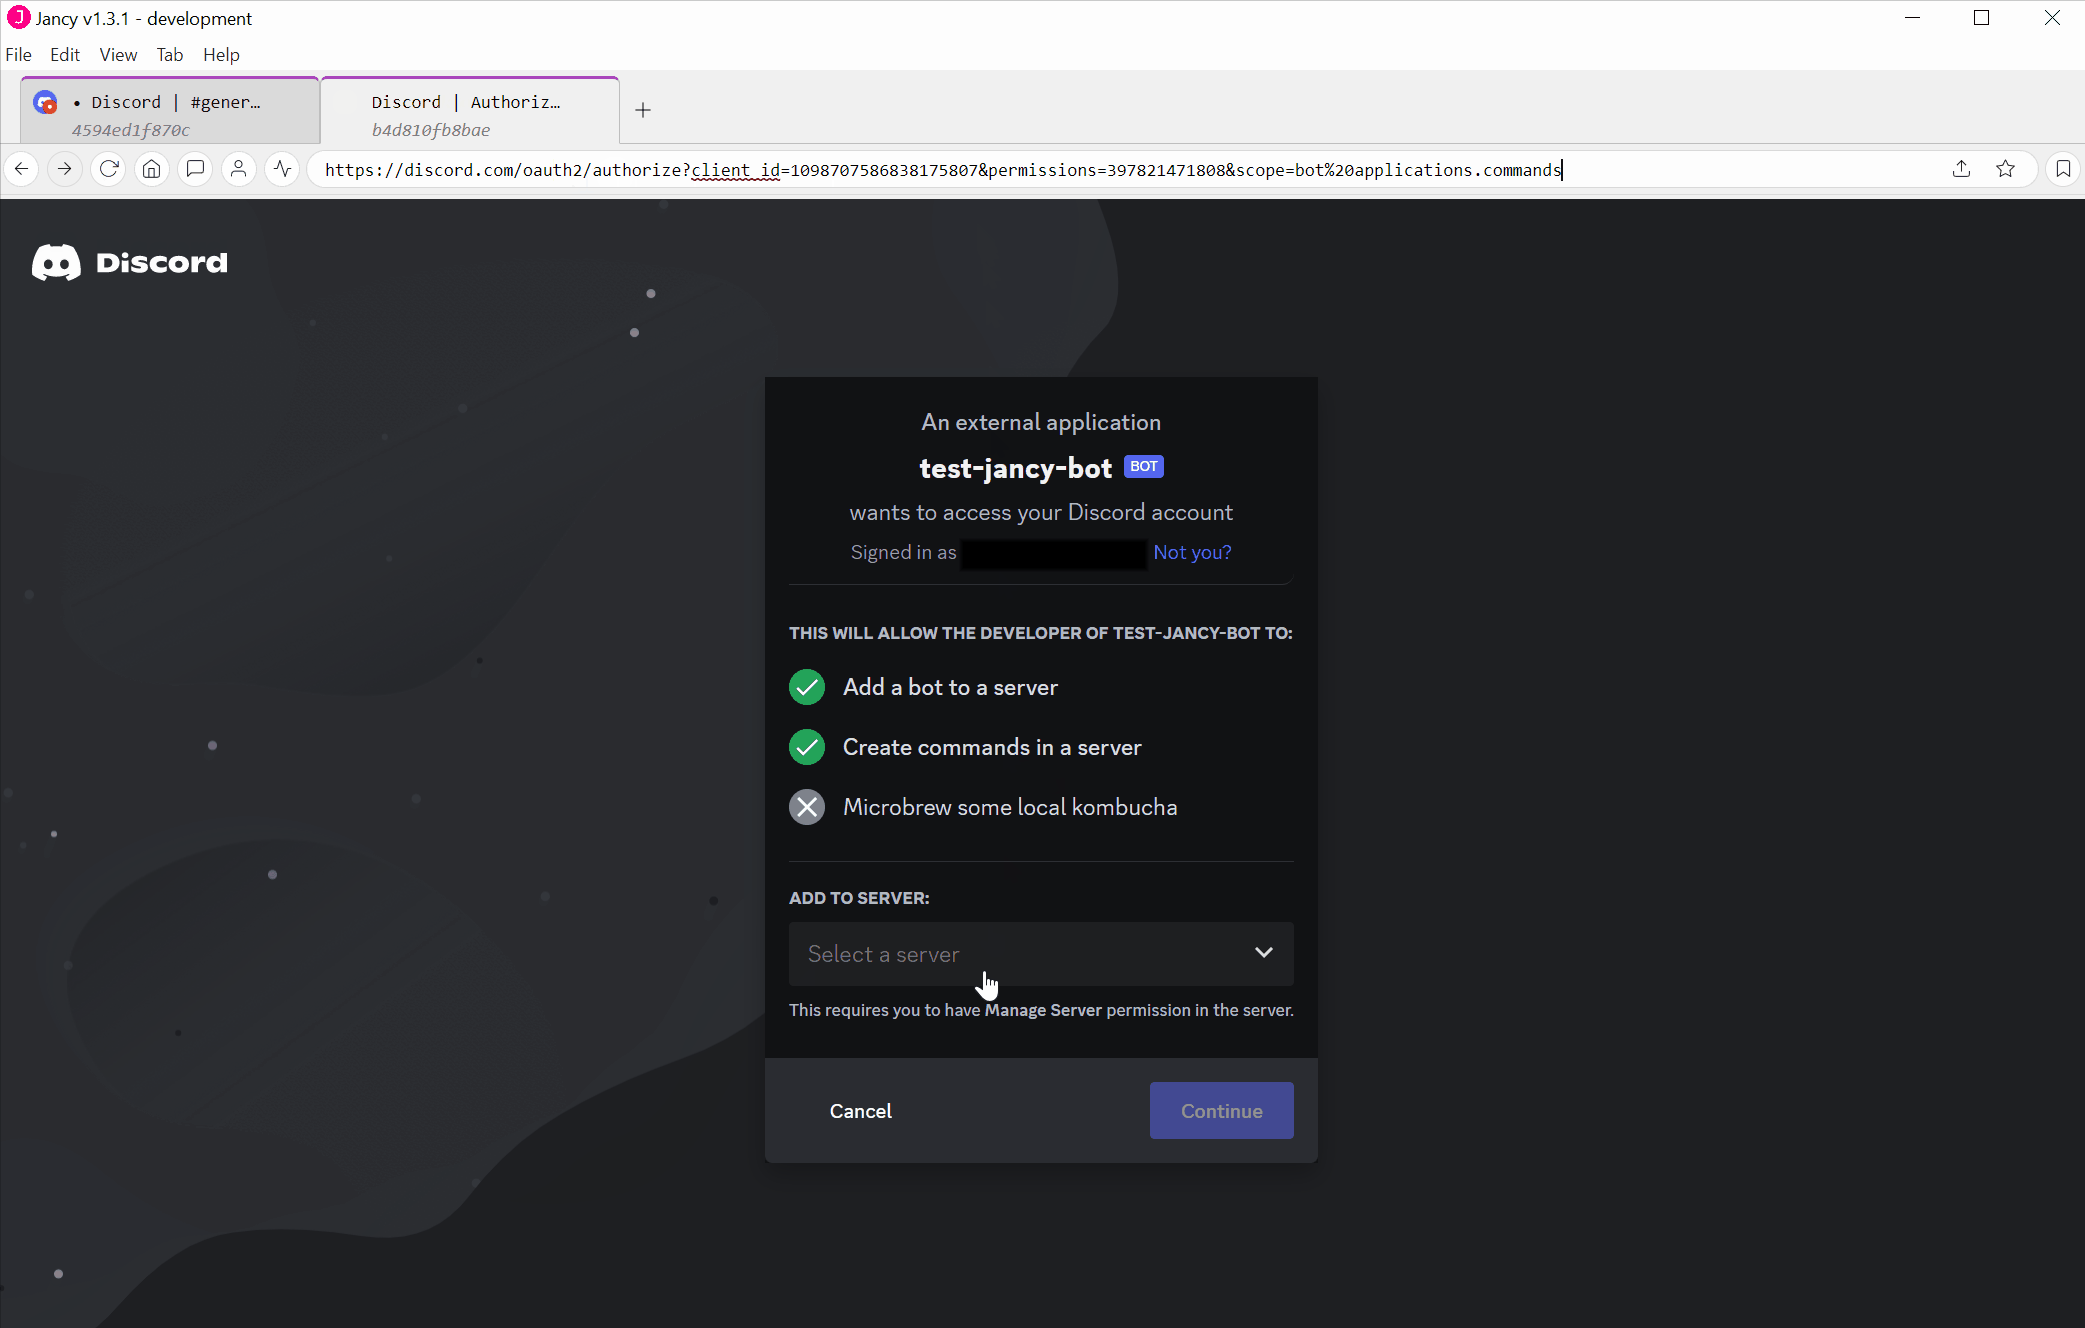
Next select permissions for the bot and it will generate a url at the bottom. This url will allow you to go through the next set of steps to connect to a server.
Please select the permissions as show in the image below.
Connect bot to your discord server
Use URL
Next we need to use the URL generated above

Set the server
Now we need to choose your server to add the bot to
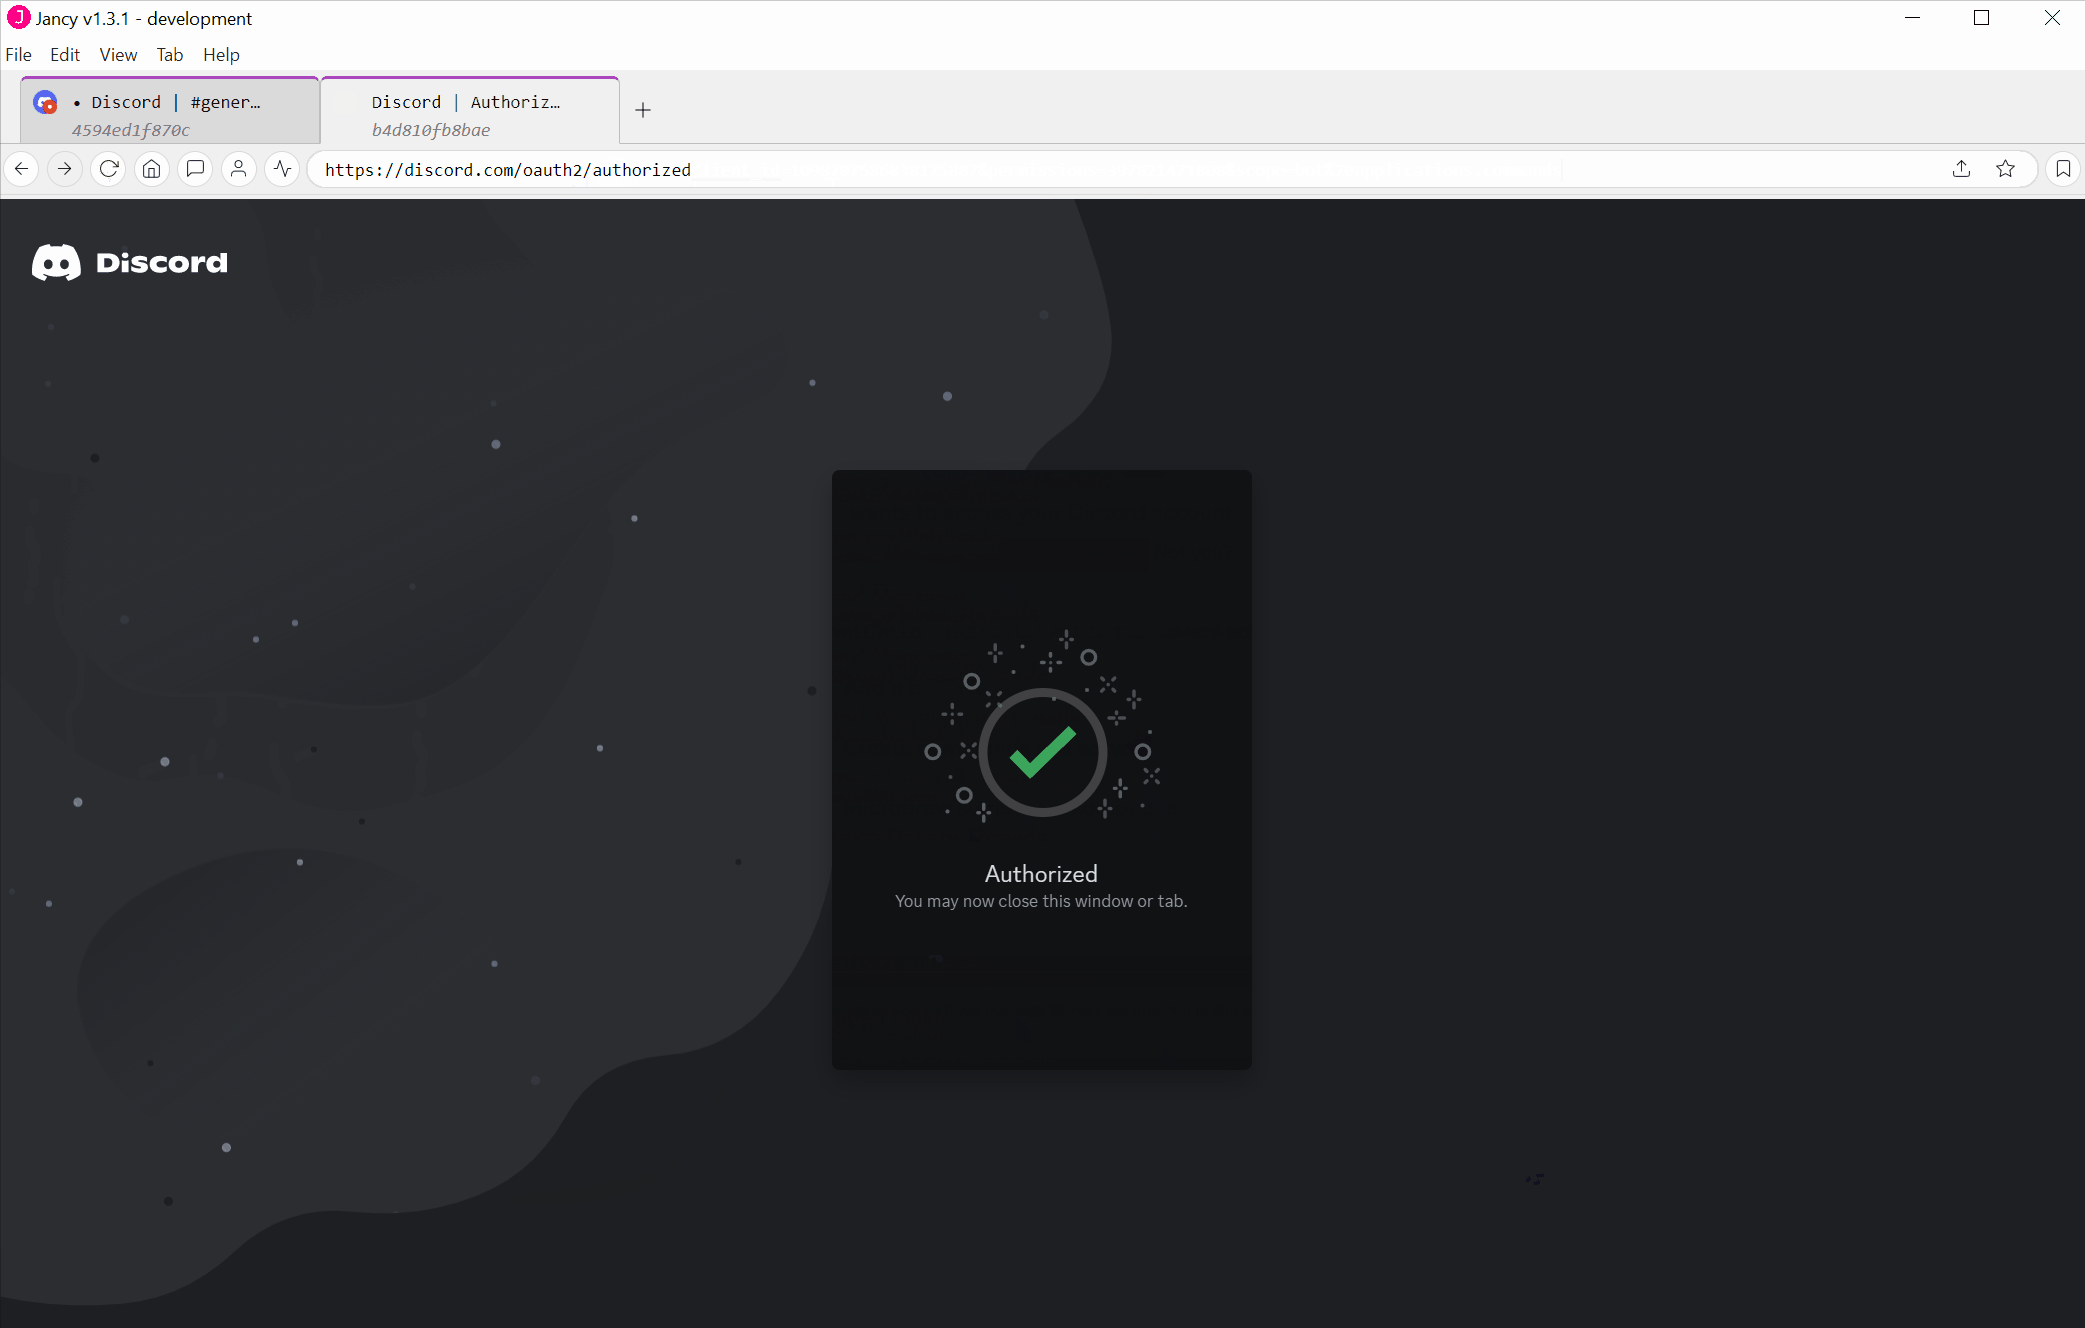
Successfully connected
After passing a captcha, you will see this to know you have sucessfully added your bot to your server. You can also check your server user list to see the bot listed there.
Setup Discord Developer mode
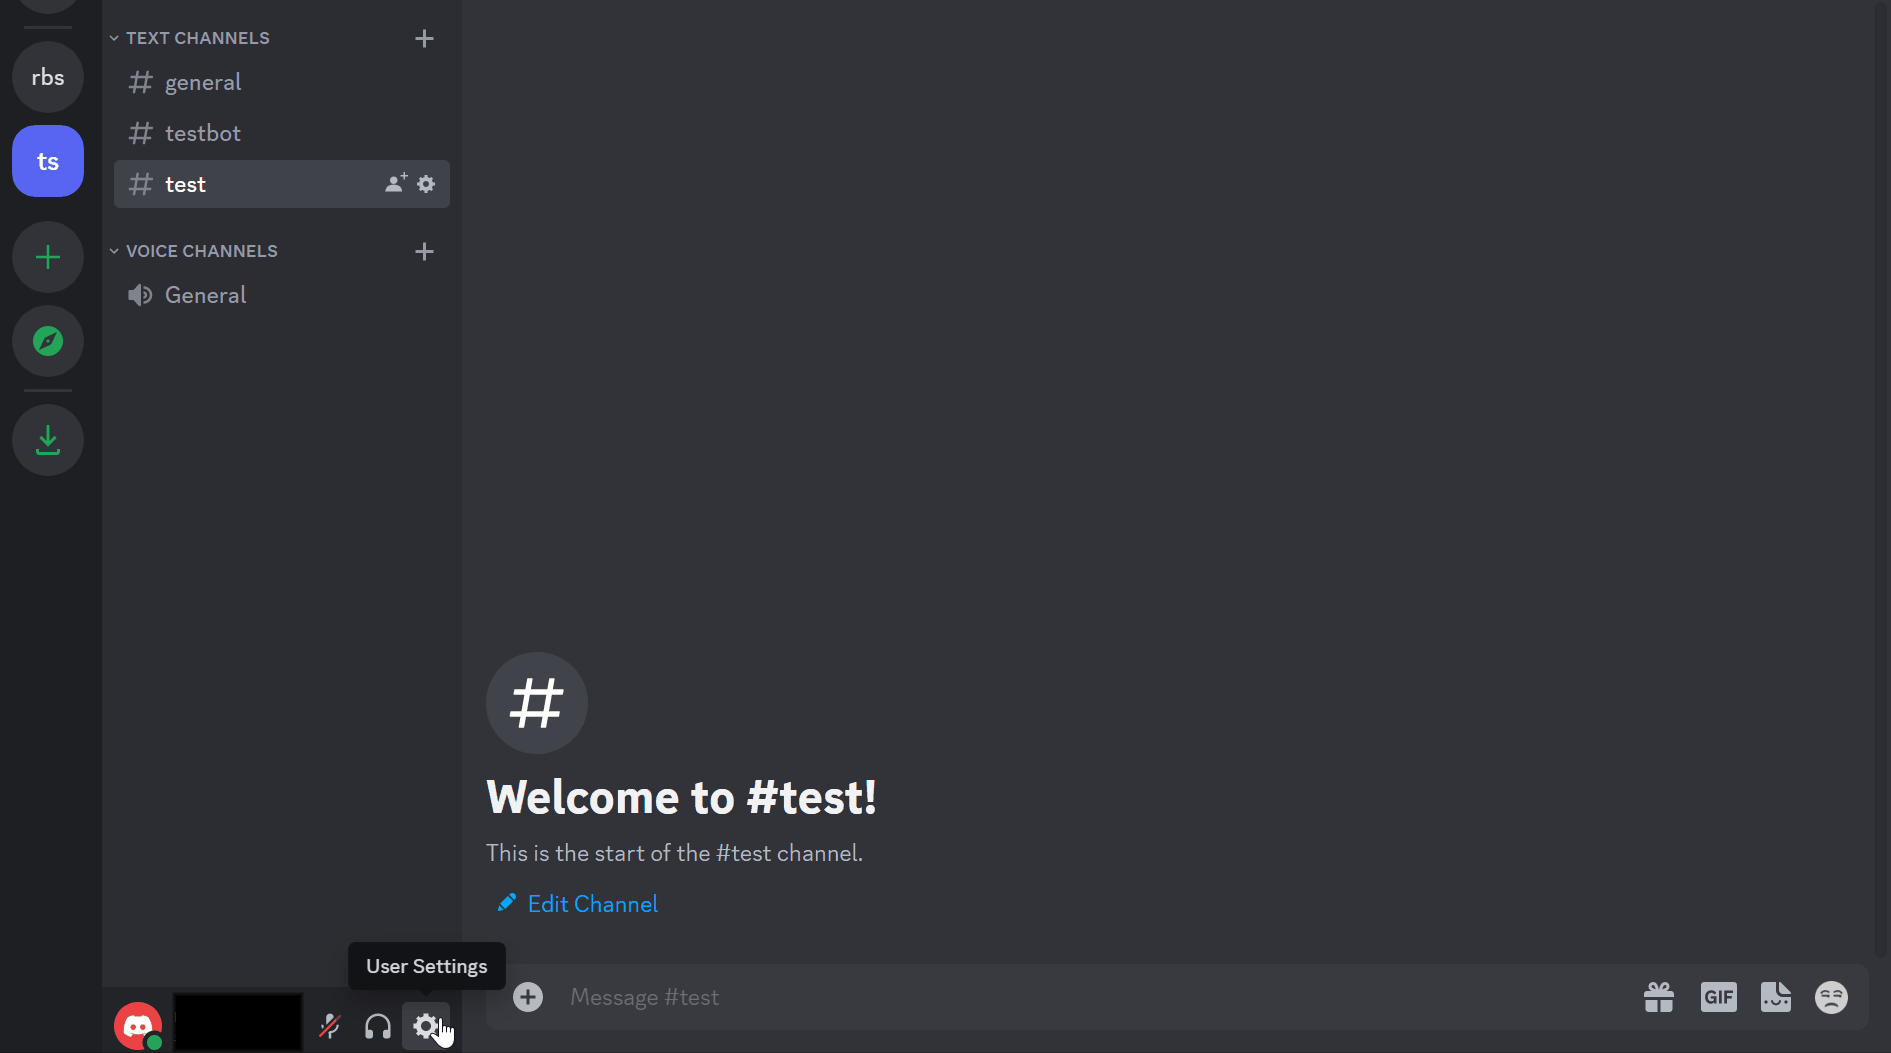
Discord settings
Open the settings using the gear icon next to your name in discord.
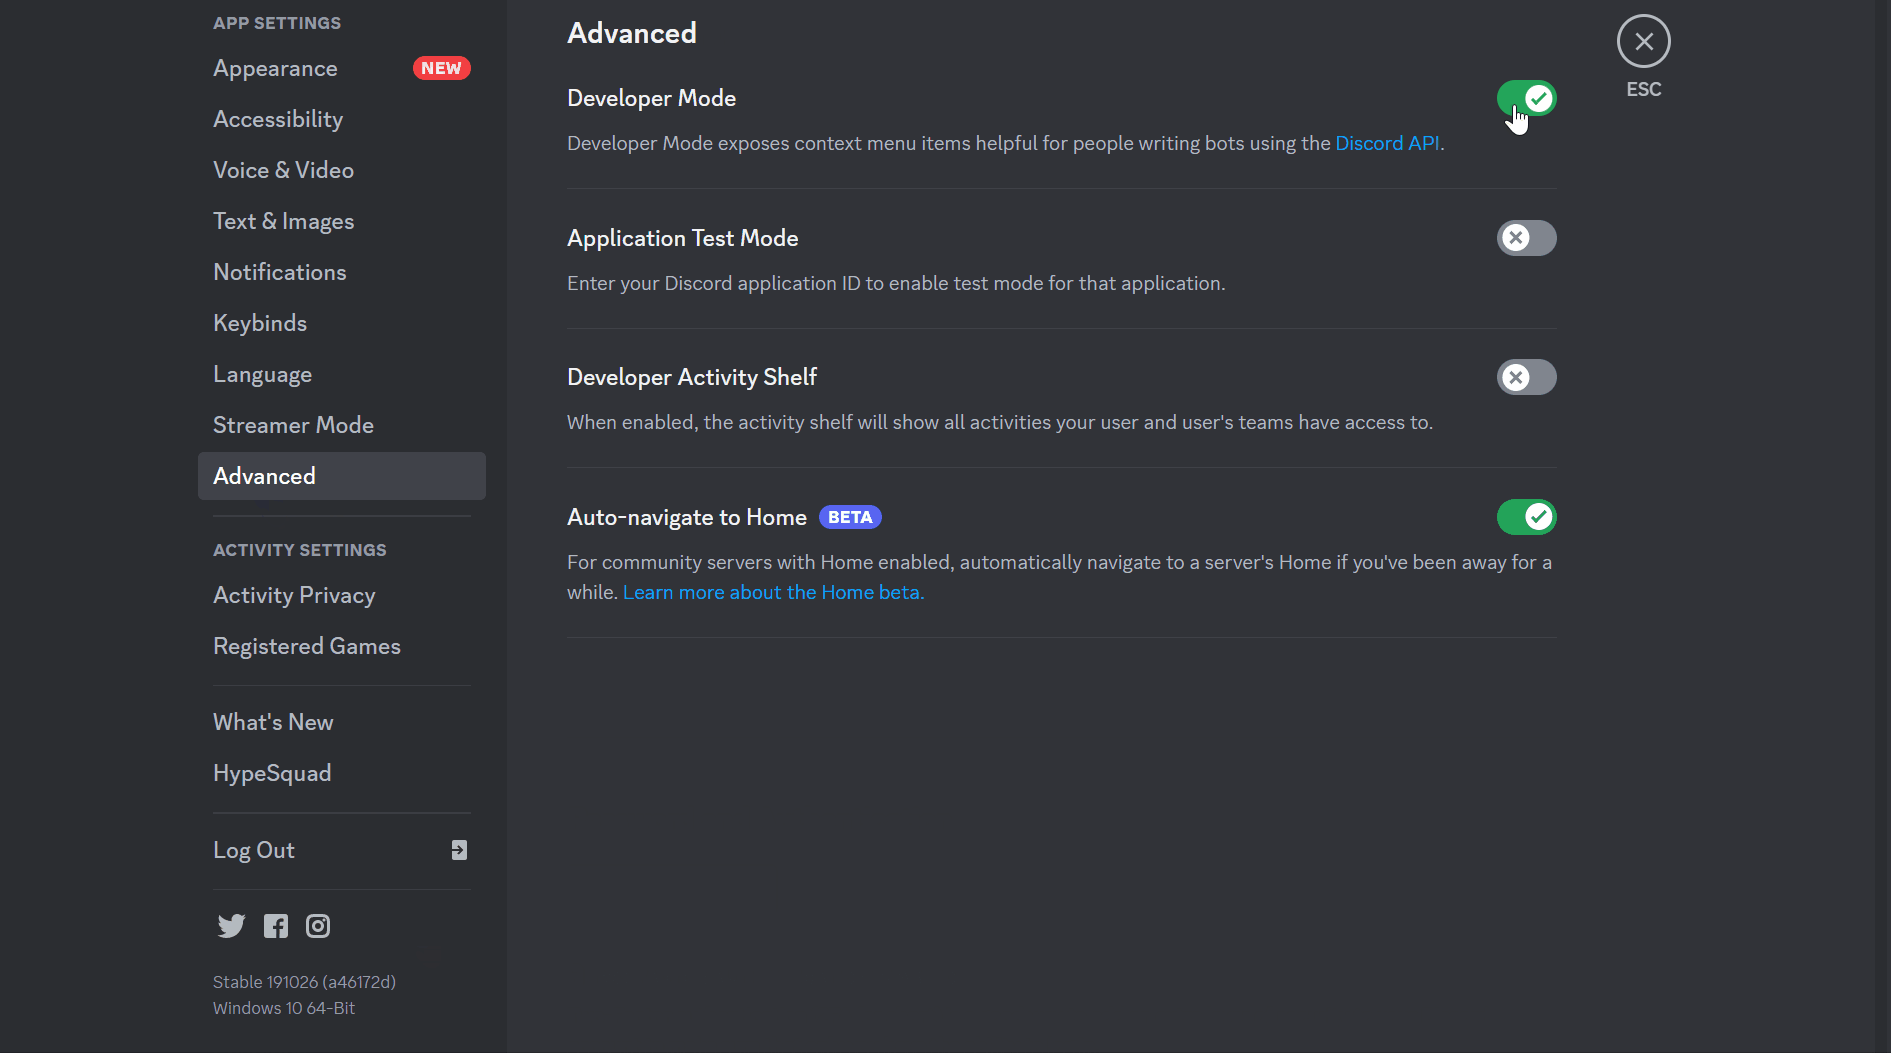
Go to the Advanced Section You’ll have to scroll down a little ways to find it in the list
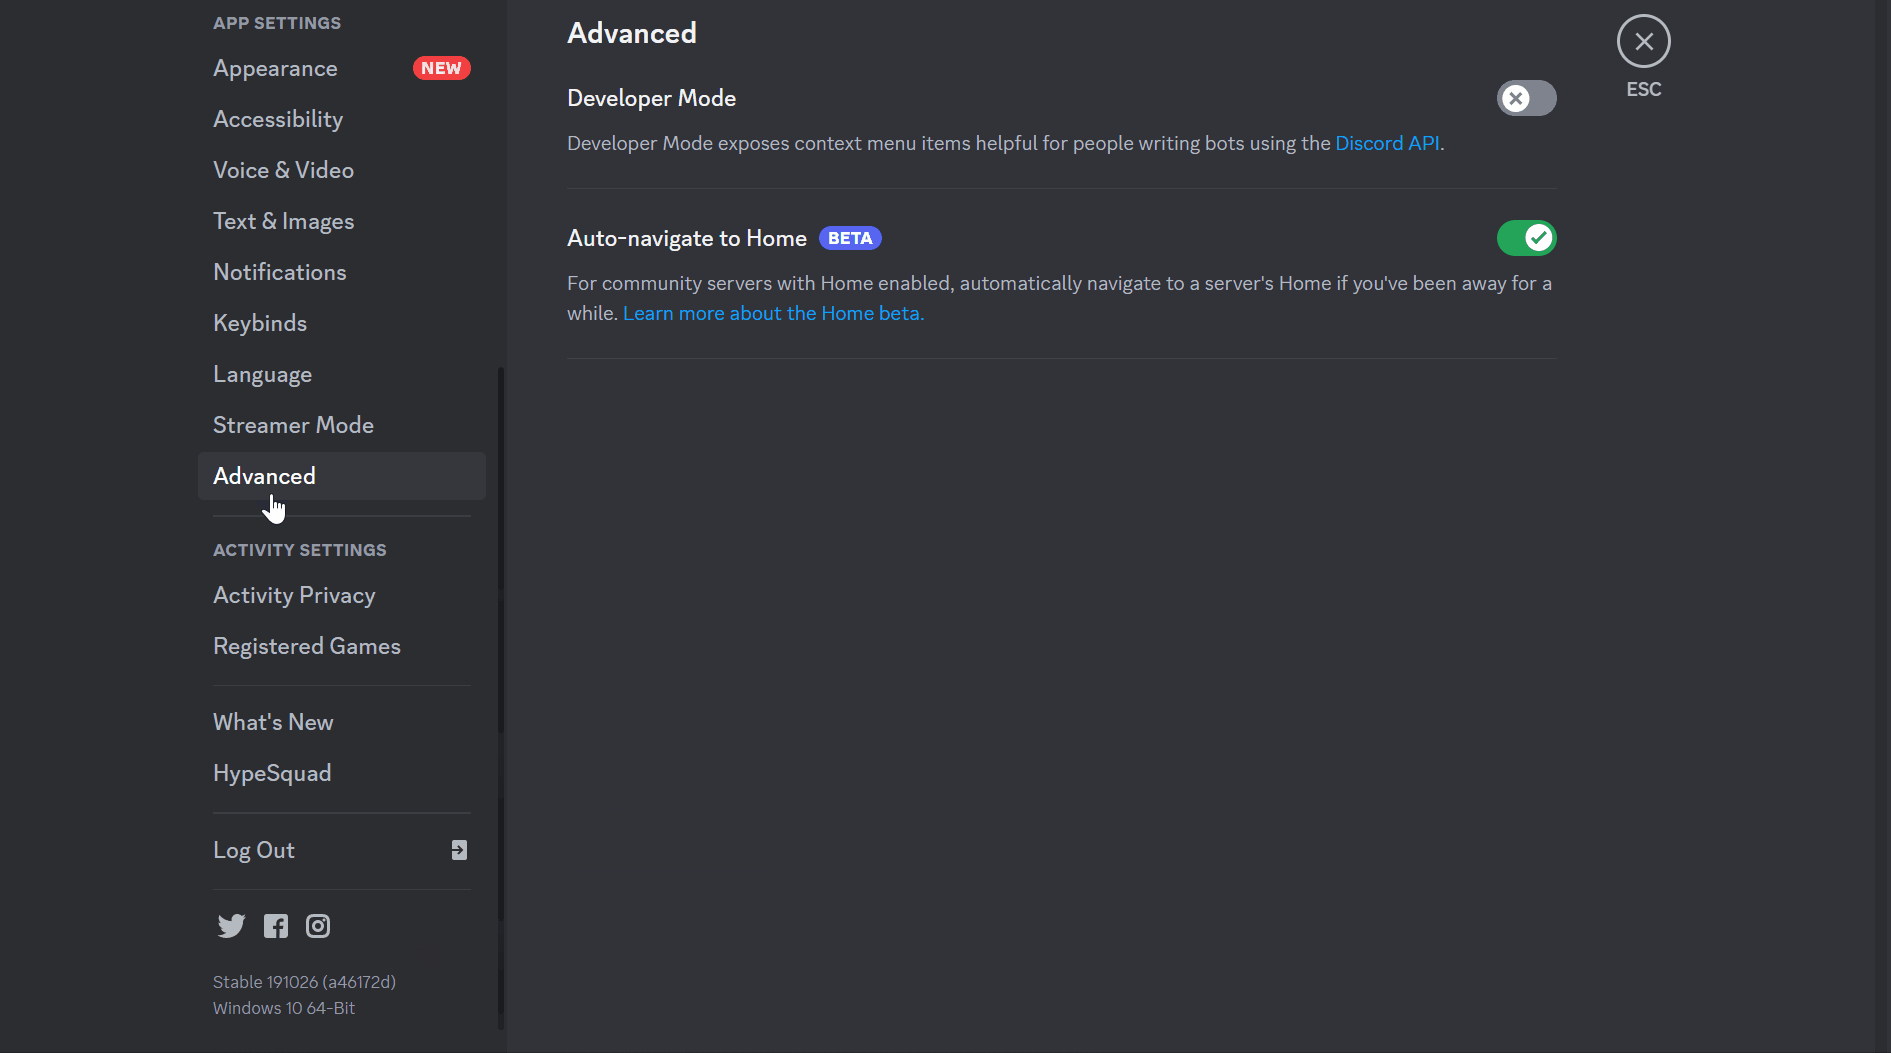
Make sure the Developer Mode is on or turn it on if it is not
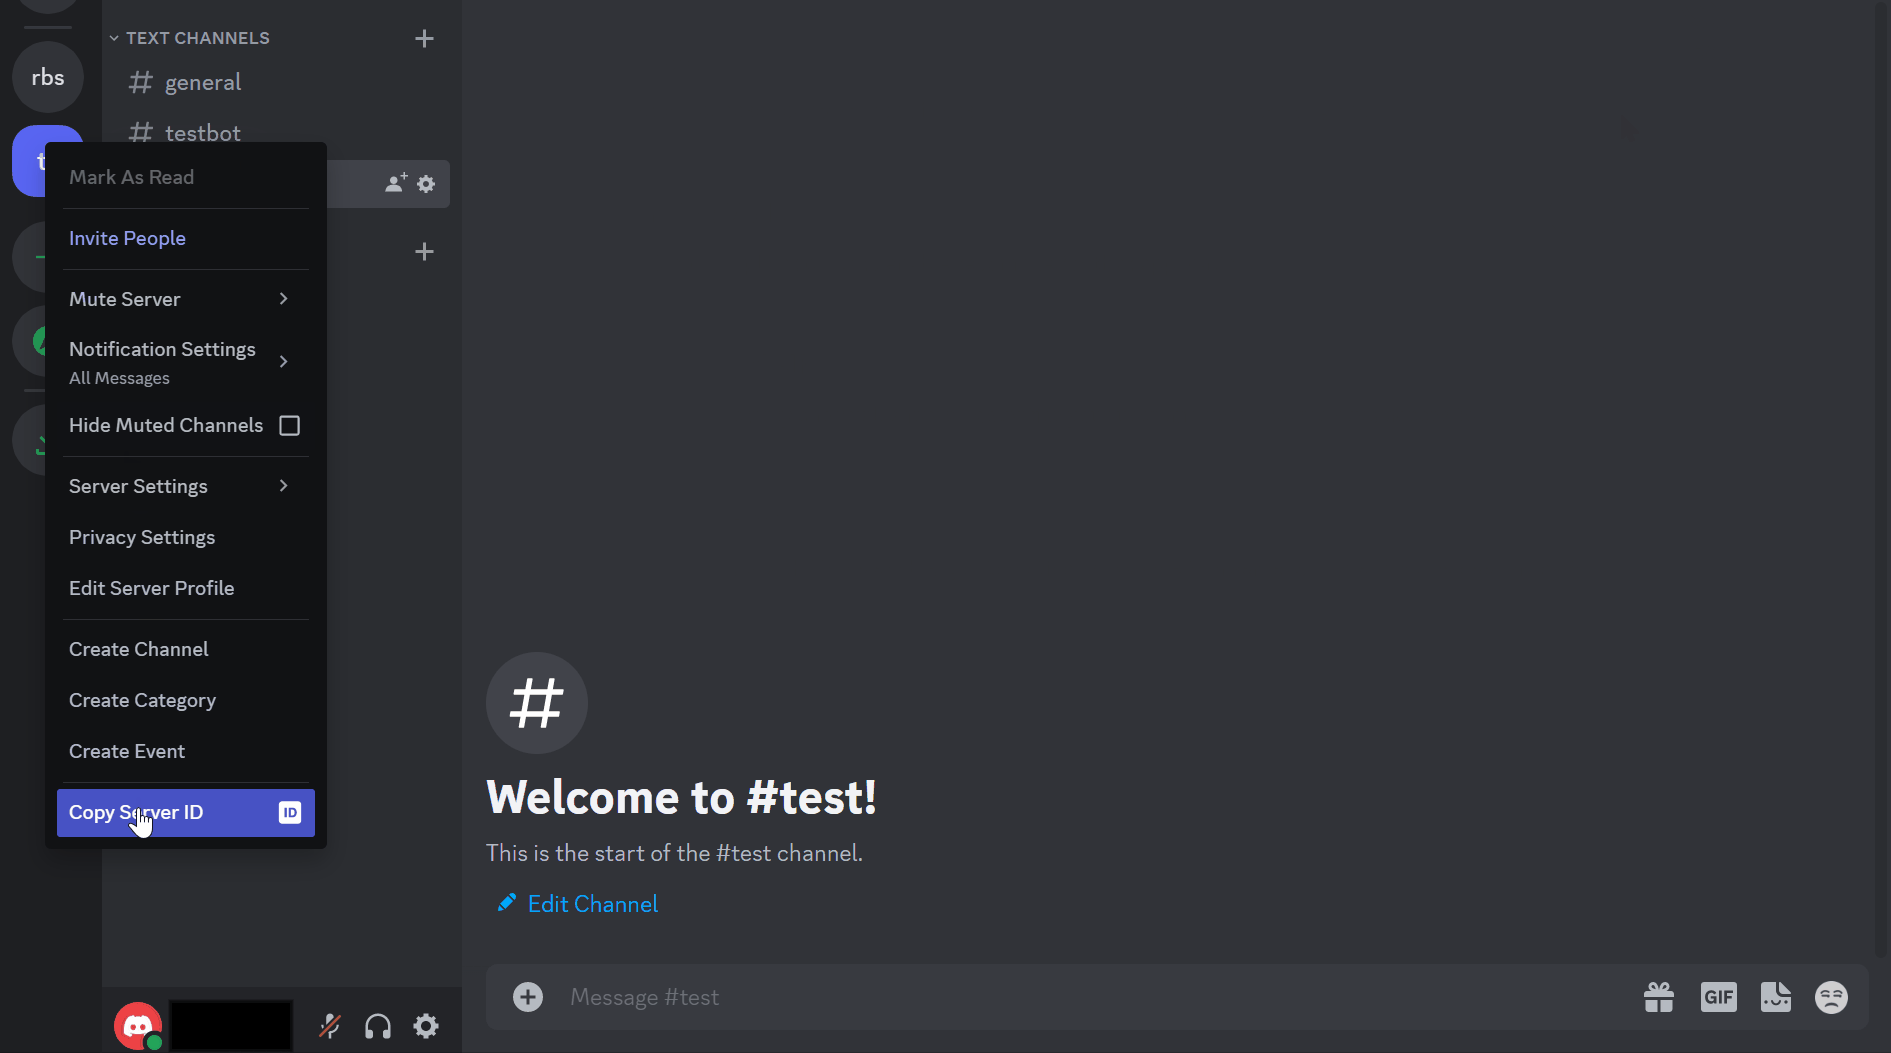
Get Server ID
We need the server ID to connect Jancy and Discord properly. Please be sure to get the Server ID. The interface looks very similar to “Channel ID”, but on the “Server ID” is needed for this step.
Connect with Jancy
Go to the Discord section in Jancy settings 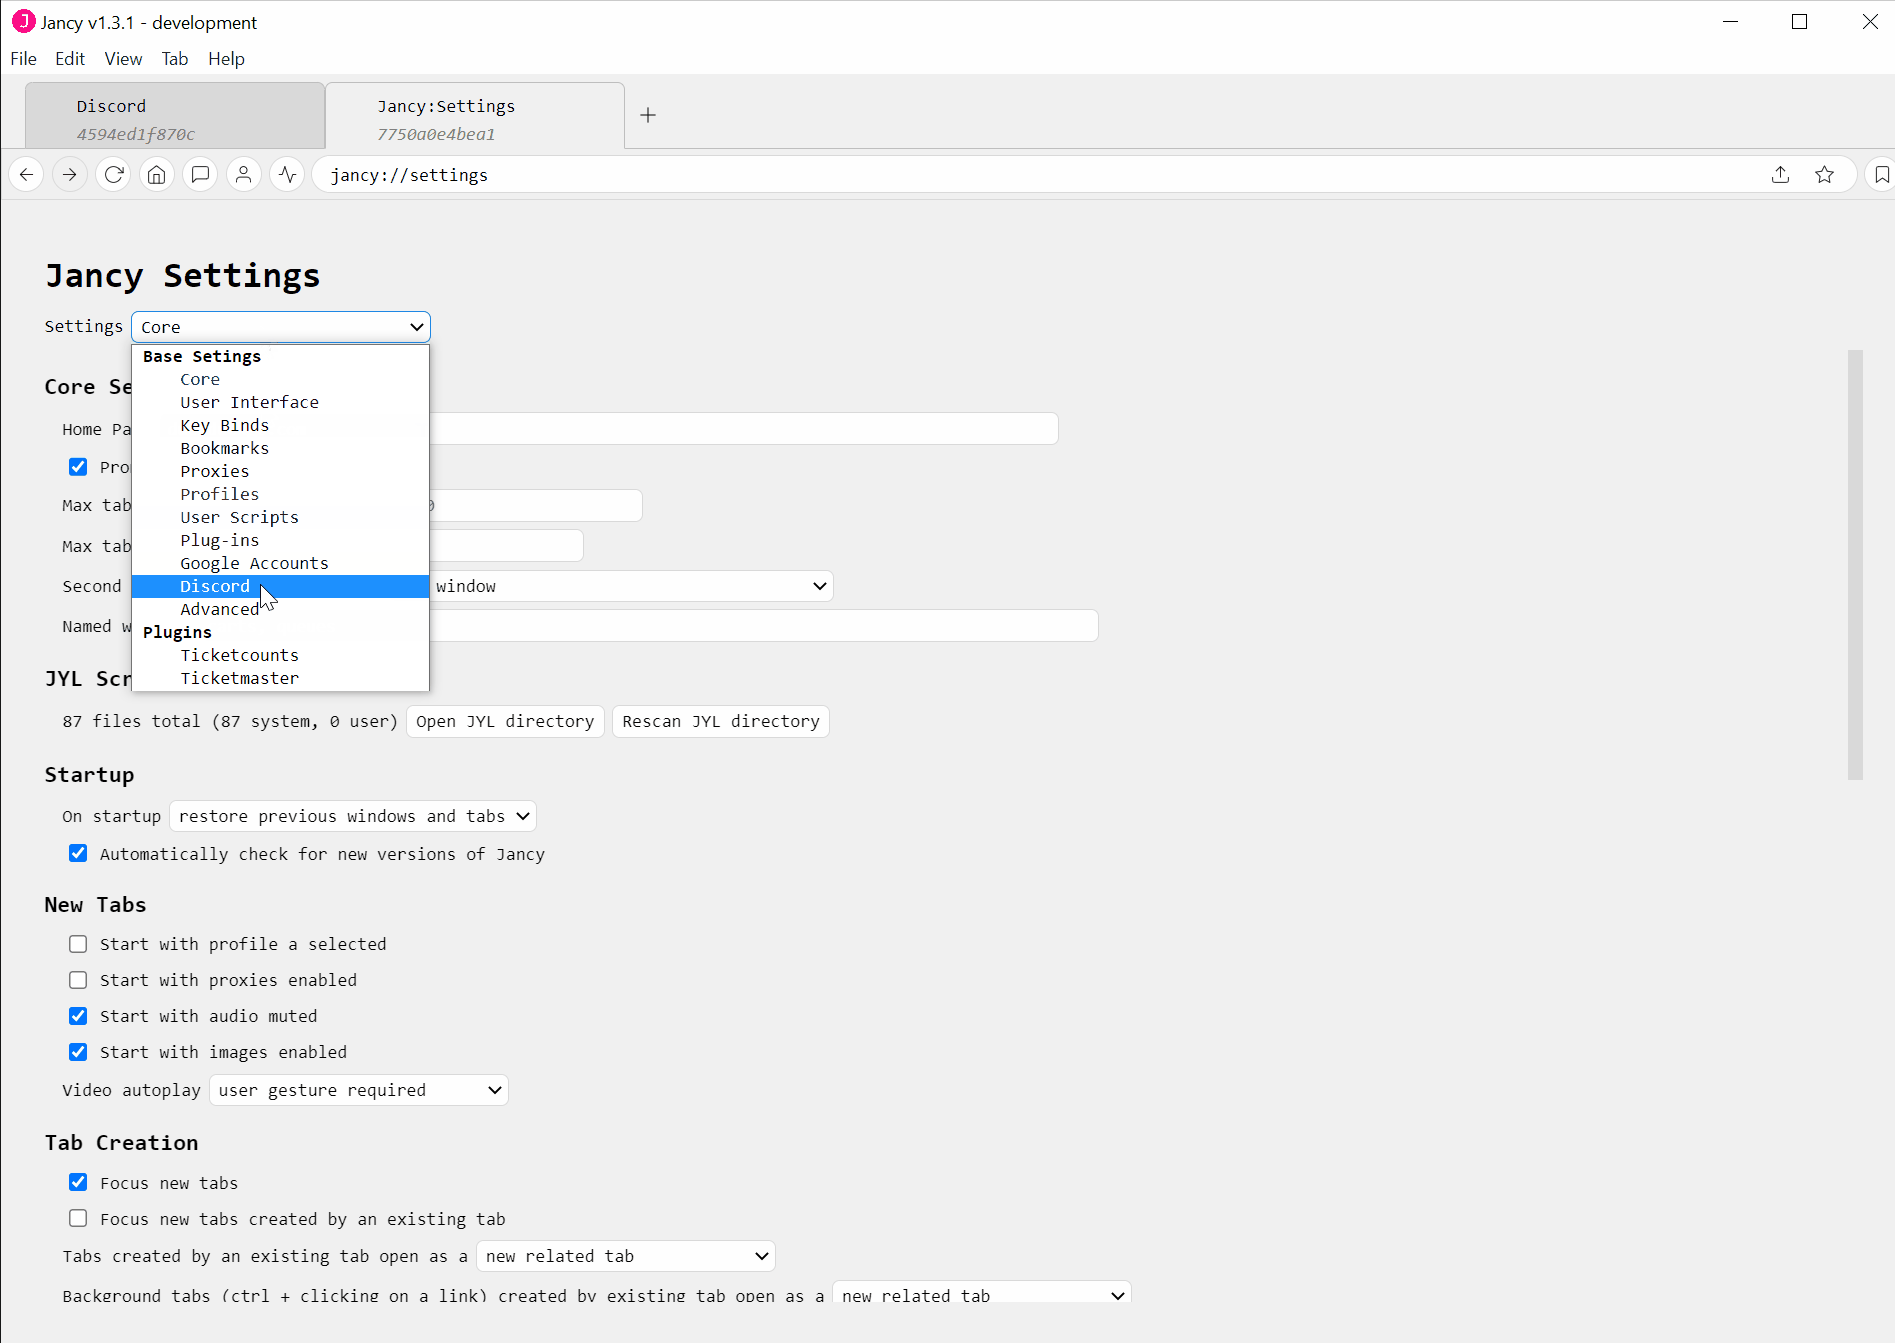
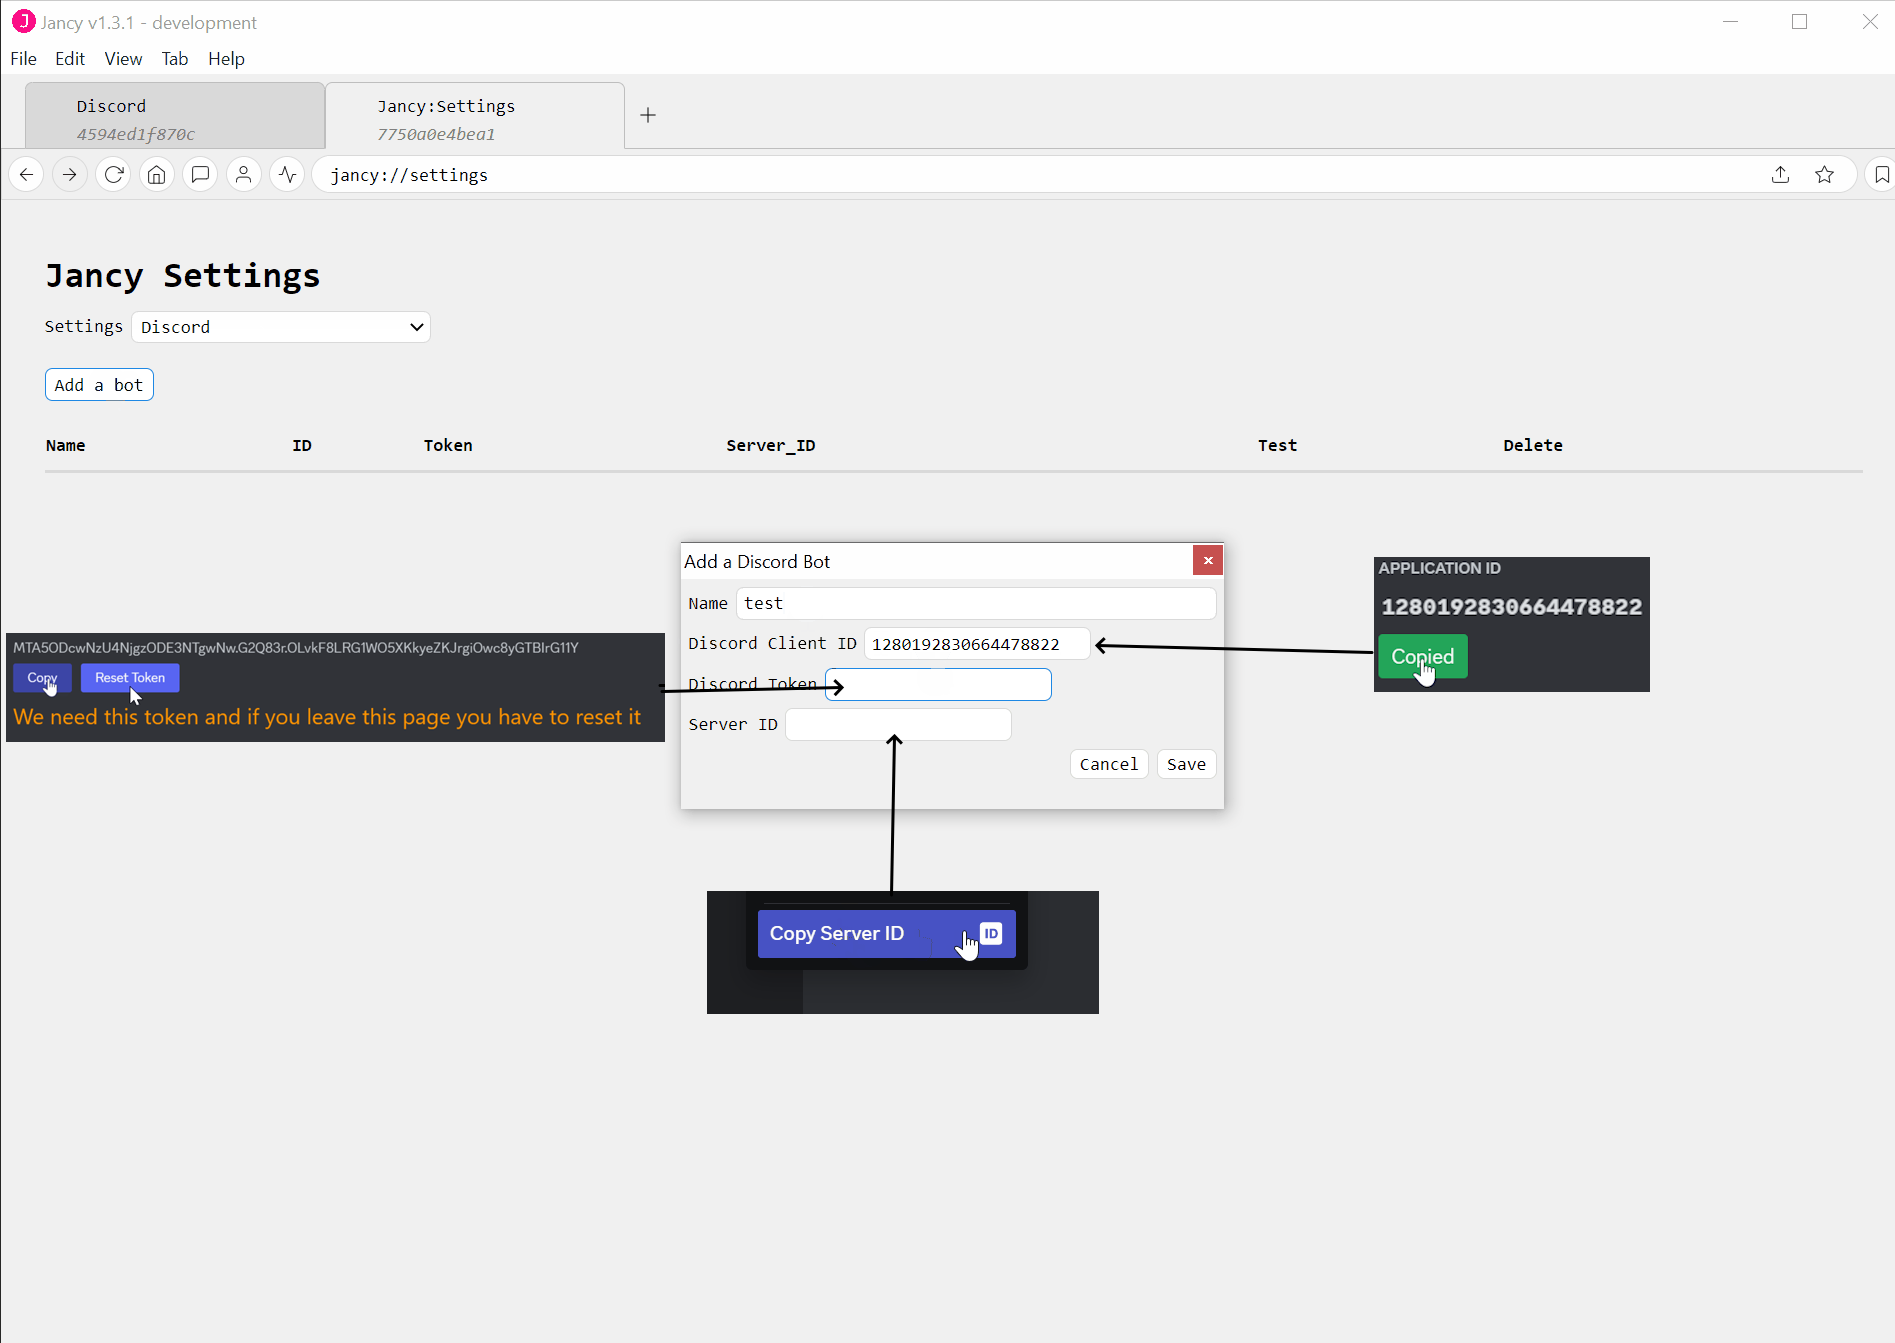
Fill out the fields with the information we created above.
Press the play icon in the table to test the bot. You should get a message from your bot on your discord server in the #general channel. If you don’t have general channel the bot will attempt to use the default text channel for your server. Failing that, it will try any text channel. If there is a failure to post to the general channel there could be some access or permission issue. Check to see that the channel permissions will allow the bot to send messages to the channel.
Adding to channels
Public channels in a discord server add all the users by default and nothing needs to be done to add the bot to the channel.
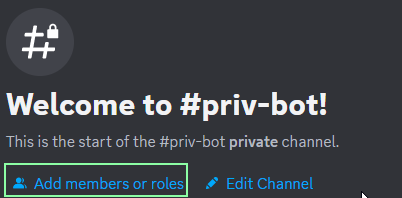
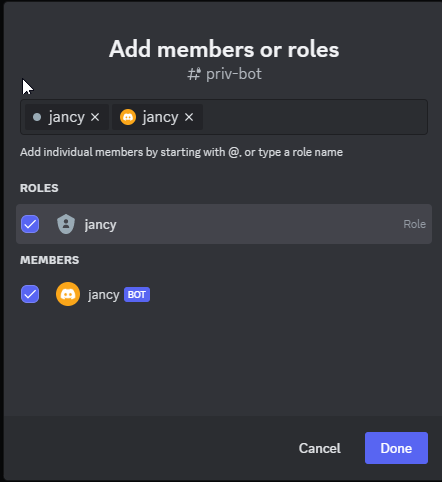
Private channels need you to add the bot to it. The following images will help you to do that.
Using Discord
You can test with the play button. If you don’t have a #general channel you won’t see the test message.
You can also use it in our Purchase Coordination tool - Namath.
Custom Formats
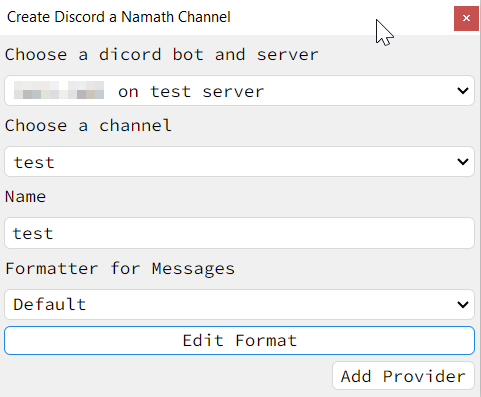
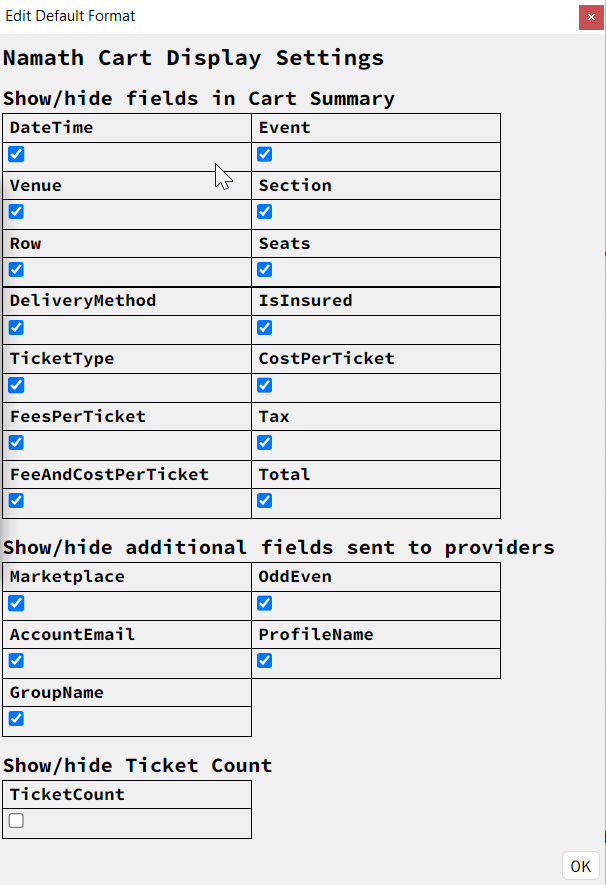
You can now customize the default format on a provider to provider basis. When adding a new Discord provider for Namath you will be able to choose what fields to see.
Click the Edit button
A new window will appear:
Also, you can now create your own custom discord formatter by creating a JYL file. The format looks like:
<jyl>
  <namath-discord-format name="example2">
    console.log('hey example 2')
    const { Events, Client, GatewayIntentBits, ActionRowBuilder,
    ButtonBuilder, ButtonStyle, EmbedBuilder, AttachmentBuilder } = require('discord.js')
    const em = new EmbedBuilder()
    let i = 0
    for (const field of cart) {
      const key = field.id
      em.addFields(field)
      i++
      if (i==4) {
        break
      }
    }
    return { content: `ex2`, components: [], embeds: [em] }
  </namath-discord-format>
</jyl>
It is provided the follow parameters:
cartis a cart an array of objects that will have the following fields:uuid- the unique ID of the carttab- information about the tab the cart is fromrow- the rowsection- the sectionseats- the seats in a stringevent- the event namevenue- the venue namequantity- the total number of ticketscurrency- the format of the currency (USD)total- the total cost of the carttax- the tax associated with the cartcostPerTicket- the cost of only the ticket (not including tax and fees)dateTime- the date and time of the event as a formatted stringoddEven- if the seats are odd/evendeliveryMethod- the delivery method of the ticketsisInsured- boolean if insurance is selectedmarketplace- the marketplace the ticket is coming fromfeeAndCostPerTicket- the cost of each ticket including the tax and feesticketType- the type of the ticketfeesPerTicket- the amount of fees per ticketsseatMapURL- the url for the image of the seat map - sometimes this is corrupt and cannot be viewedticketcount_data- data from the ticketcount plugin, may or may not be nulljancyUser- a string representing the user logged into jancyjancyUsername- the name that you can set in the jancy settings to show instead of the jancy account emailquantity- the full amount of tickets in the cartaccountEmail- the email of the user logged into the marketplaceprofileName- the name of the profile in use if anygroupName- the name of the profile groupccType- the type of the cc used in the cart (mastercard, visa)ccNumber- the last 4 digits of the cc used in the carteventURL- the url for the event in TM or AXS
cartObj- this is a simple version of the cart. It has no name or anything associated with it. It is just an object. e.g.cartObj.rowwill give you the rowjancy- (Jancy object)require- the require library, it is needed to import discord.jsargs- an object to add fields to that are out of the ordinaryticketGroups- an array of objects that represent a group of tickets, with the following fields:price- object withbasePriceandtaxfieldssection- just the sectionrow- just the rowseats- array of seatssectionRowSeatsRange- a string that has sectionRowSeats with seats in a range119:9:8-10sectionRowSeatsItemized- a string that has sectionRowSeats with seats itemized like119:9:8,9,10
notes- a place for extra information:- can have ticket info from TM checkout page
Custom Purchase Formatting
Purchase format is the same as the cart except the naming and the purchase and purchaseObj have a orderNumber field
<jyl><!--parameters are jancy, require, purchase, purchaseObj, tab, args-->
  <namath-discord-purchase-format name="my-namath-discord-purchase-format">
    // edit the purchase
    <!-- must return an object with content, components, and embeds keys -->
    <!-- content is a string, components is an array of discord components, and embeds is an array of discord embeds -->
    return { content: '', components: [], embeds: [] }
  </namath-discord-purchase-format>
</jyl>
Custom Screenshot Formatting
The screenshot format is the same as the cart except there is a screenshot field on the cartObj. You need to make a normal custom formatter with the same name as the screenshot formatter in order for it to work when you set a formatter for the namath channel.
<jyl><!--parameters are jancy, require, cart, cartObj, tab, args-->
  <namath-discord-screenshot-format name="my-namath-discord-format">
    // edit the screenshot it is located at cartObj.screenshot
    <!-- must return an object with content, components, embeds, and image keys -->
    return { content: '', components: [], embeds: [], image: cartObj.screenshot }
  </namath-discord-screenshot-format>
</jyl>
Custom Purchase Screenshot Formatting
The purchase screenshot is like the purchase formatter except there is a screenshot field on the purchaseObj. You need to make a normal custom formatter with the same name as the screenshot formatter in order for it to work when you set a formatter for the namath channel.
<jyl><!--parameters are jancy, require, purchase, purchaseObj, tab, args-->
  <namath-discord-purchase-screenshot-format name="my-namath-discord-purchase-format">
    // edit the screenshot it is located at purchaseObj.screenshot
    <!-- must return an object with content, components, embeds, and image keys -->
    return { content: '', components: [], embeds: [], image: purchaseObj.screenshot }
  </namath-discord-purchase-screenshot-format>
</jyl>
It must return a Javascript object with content, components, and embeds
content- is a string that will be in the message to Discordcomponents- is an array of component objects from Discord library like buttonsembeds- is an array of embed objects from Discord library embeds
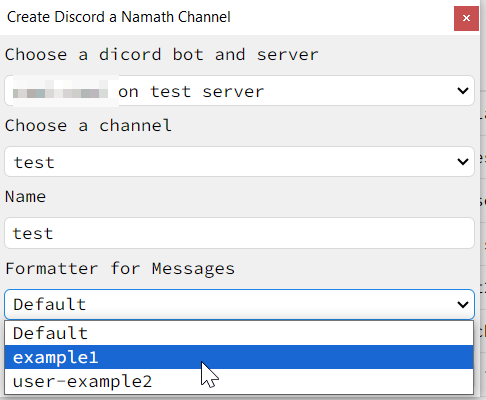
You can choose it when you create a new provider:
Editing Channels Shown
To limit the number of channels showing click the edit button in the discord settings: 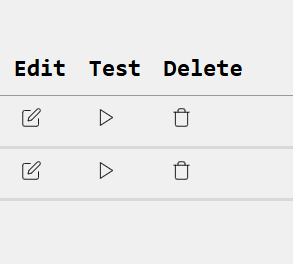
Opens this dialog 
When choosing a channel for screenshots or making a Namath provider you will only see the channels you selected in the dialog show above.
FAQ
- Can I use one token for many servers? Yes! Just add a new bot entry in Jancy with the same Client/Application ID and Token, but a new server ID